Lumion BLOG
Feel the space with Lumion
How to Render a Beautiful Scene: Part 1 - Interior Living Room
TweetShareShareShareRendering interiors and exteriors isn’t always a linear process. Even with a well-designed, furnished and textured model, you may still face numerous rendering considerations, from the scene’s lighting strategy to its object arrangement and material customization.
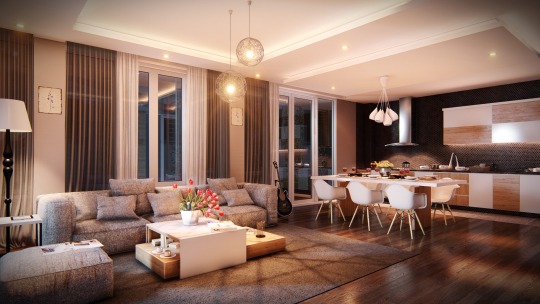
In this first edition of our three-part series, “How to Render a Beautiful Scene,” we’re breaking down the rendering process and workflow for a stylish interior living room (below). The process outlined here is not meant to be definitive, but we hope it provides some insight into how you can render more beautiful, and effective, interiors.
Whether through your lighting strategy, an effects stack or customized material settings, making a true-to-life render has countless benefits. And although you may be focusing on showing the function and form of your designs, a beautiful render can affect your audience’s feelings of well-being, mood, comfort and motivation. It influences how they perceive all the other elements of your scene.
Most importantly, rendering a stylized image helps your audience feel the spaces you’ve designed in a more intuitive, natural way, escorting them through the door and communicating an experiential view of the final design product.
Setting Up and Lighting Your Scene
Step 1: Add Spotlights and Area Lights
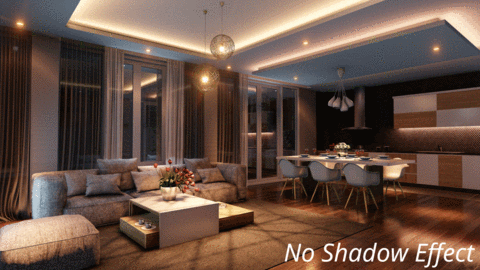
The first step in creating this render was to add the lighting elements to the scene, because without them, the render would look something like this:
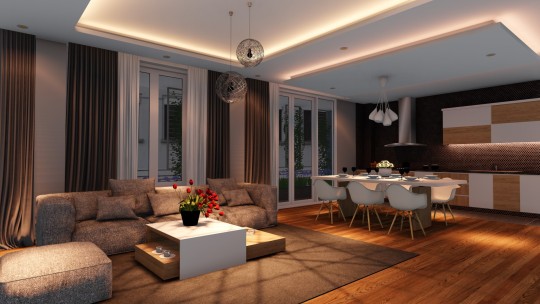
Sure, the render isn’t necessarily “bad,” but in terms of lighting, it could be better. This is because light is a powerful tool that’s used to shape our environment, visually and emotionally. Also, it is good practice to focus on your lighting strategy before you start editing the materials in your scene. This includes both visible lights (think light bulbs and nodes) as well as simulated lights (think area lights, fill lights and omnilights, for instance).
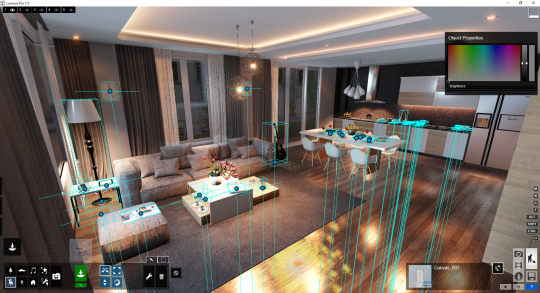
The following image shows the complete lighting strategy for the final render:

The above image may look convoluted with the blue geometric lines branching in every direction, but that’s only because this screenshot is showing you all 39 of the scene’s artificial light elements, including spotlights and area lights.
Breaking down the above image, there are really only three different types of lights, and almost all of them are individually configured to accommodate the lighting needs of the scene. These lights include:
- 13 ceiling spotlights providing narrow beams with fall-off

- 9 general use spotlights for lamps, light bulbs, extra lighting, etc

- 17 area and line lights for stylish interior lights as well as simulated/reinforced natural lighting

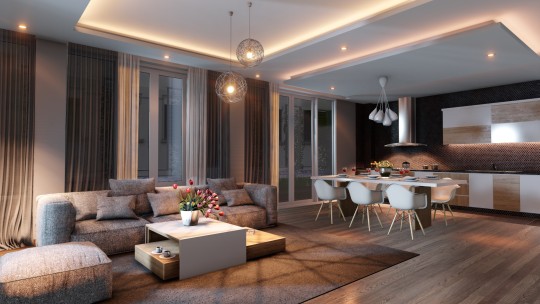
Speaking of area and line lights, you can clearly see the effect of these lighting elements in the crevices along the ceiling (those long, rectangular lights). And although these lights are great for simulating a specific light source, they also function well for simulating sunlight when placed behind a window, such as in the image below:

Step 2: Edit the Scene Materials
There’s a reason why it’s important to customize the scene’s lighting before tweaking and optimizing the materials. Due to the effect of lighting on your overall scene, you can use the scene’s lighting to make informed material decisions, including:
- The material’s specific color and shade
- The material’s Normal Map for texture detail
- The direction of the Normal Map
- The material’s glossiness
- The material’s reflectivity
- The material’s level of relief
- The scale of the material’s detail
To better understand how Lumion’s material settings can affect the look of different objects, let’s evaluate a real example. For instance, the following image shows the scene’s kitchen with a reflective, steel refrigerator as well as wood drawers and cabinets, a granite countertop, a chrome sink, etc.

First, let’s consider the refrigerator. Its silvery appearance was created with a simple gray color, high reflectivity and medium glossiness. Its material settings are:

To understand how the different sliders affect your materials, it can help to toggle the sliders and see how the setting impacts the preview scene as well as the final render. For instance, let’s see what happens to the refrigerator if you were to turn its glossiness slider to 0. The refrigerator takes on the following appearance:

The reflectivity slider is quite similar to gloss, but there are some fundamental differences between the two. For instance, here’s the scene with the cabinet and refrigerator reflectivity turned down (the gloss slider is back at its original setting):

The relief slider focuses on the smaller details and nuances of your materials. Turning down this slider shows a flatter-looking material (left) while turning it up means deeper, more pronounced detailing (right).

In addition to the standard customization sliders, the weathering slider is really important and may be useful as a compulsory setting to tweak with most materials. Through this slider, you can create imperfections, impart authenticity, and age materials with a simple click of the mouse.
For a visual representation of how the weathering feature works, refer to the following gif:

As shown in the above example, the weathering tool gave the light fixture a little age and imperfection. More importantly, however, is the highlighted three-dimensional form that the light fixture acquired. This is due to the Weathering effect’s ability to create beautiful shadows and 3D occlusion, which also help provide greater depth and improved material quality.
Adding Effects in Photo Mode
Materials…lights…render? Almost, but we’re not quite ready yet. After implementing your lighting strategy and optimizing the materials under that light, it’s time to truly focus on fine-tuning the small, yet essential details of your render.
Step 3: Choose Your Camera Angle
Before you start editing the visual details of your render, it can be helpful to choose a camera angle, the specific location where you place the “camera” for your render. Because every building and every scene is different, this angle is entirely dependent on your project as well as your rendering goals.
Nevertheless, some tips for choosing a camera angle include:
- Make use of the Focal Length slider to control the angles of perspective. Choosing the right angle can add a realistic sense of scale or create dramatic close-ups
- Aim the camera at the geometry you want to be the subject of your scene
- Ensure that the composition of the scene tells the story you want
- Learn the basics of traditional photography practices, such as the rule of thirds
Choosing your camera angle before making further adjustments can be important, though it may not be your “preferred” workflow method. Nevertheless, many users find it easier to choose the camera position without the effects added.
Step 4: Adding Reflection Planes (Planar Reflections)
The next step is to assign reflection planes to particular surfaces. Without these planar reflections, it’s really easy for the scene to look lifeless and unrealistic, especially if there is a lot of water or glass. Keep in mind, however, that reflections can ask a lot out of your graphics card, and adding more reflection planes can increase rendering time.
Even for our example image, which doesn’t have substantial glass or water, there are eight reflection planes. For our scene, the following gif shows the reflection plane arrangement:

For a better idea of how reflections impact your scene, here are two comparison renders:

Step 5: Edit Your Materials Again
After assigning the planar reflections, and working in concert with your other light adjustments and effects, it’s a good idea to check your materials again.
If you go directly to build mode, however, you won’t be able to edit with the photo effects turned on. For this reason, you can use the “Build With Effects” option.

Furthermore, by choosing the “Medium” setting for the reflection effect’s preview quality, you can discover an almost exact representation of how light will reflect off your materials. Through the Build With Effects mode, we were able to make the following decisions regarding the wood floor material.
Before:

After:

Step 6: Configure the Sun and Shadow Effects
The sun effect gives you four possibilities for customizing the way Lumion’s sun illuminates your scene, including:

These sliders are pretty straightforward and you can achieve optimal sun settings simply by playing around with them. For the default render, the sun height is at -0.1, which means that the sun is just below the horizon and emitting an early-evening ambience.

Configuring the sun is an essential task for any render, but it’s just as important to consider its counterpart: shadows. Found in the world category of the photo and video effects, the shadow effect lets you tweak and optimize the quality of the shadows in your scene. Some of the shadow characteristics you can toggle include:

Like the sun setting, you can figure out how these sliders affect your render by playing around with them, toggling them up and down and taking note of the changes. By adding the shadow effect (with the settings you see above), the resulting effect on the image’s shadows are as follows:
Combining the shadow and sun effects are so important for a realistic-looking render. By optimizing these two effects, there’s a pleasantly blue ambient light with some soft, romantic yellows.
Step 7: Global Illumination
Global illumination is a crucial tool as it has a significant effect on the realism of your lighting and, therefore, your overall render. So, what is Global Illumination?
In short, this effect analyzes all surfaces illuminated by environmental or artificial light sources. After the analysis, Global Illumination places probe lights on these surfaces to simulate “reflected” light.
At first glance, the interface can look a little overwhelming…

…but it’s actually surprisingly simple. All you need to do is select the lights that’ll emit the Global Illumination effect, and then toggle the spotlight GI Amount (the strength of the simulated reflecting light). As a result, a darker image goes from this…

…to this…

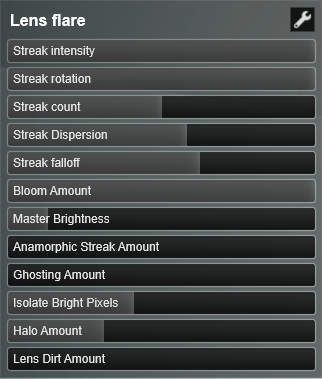
Step 8: Lens Flare, Analog Color Lab & Vignette
Achieving a sense of realism in your render means applying stylistic effects. By doing so, you can simulate many aspects of photography, including lens flare, vignetting and color adaptations.
Starting with the lens flare effect, you can find its settings below as applied to the living room render.
Essentially, the lens flare effect makes your light elements look as if they are “exploding,” a natural (and common) photographic phenomenon. This effect is most visible in the room’s central, hanging lights:

The analog color lab is another popular effect that automatically tweaks color shades and overall color profile, instantly changing the feel of a scene.
Lastly, the vignette effect darkens the corners of your image without modifying the center, bringing focus to the center of the image while adding subtle photographic style.

Step 9: Hyperlight, Sharpness & Noise
The final three effects of this week’s living room render include Hyperlight, sharpness and noise. Of these three, however, Hyperlight is arguably the most important because it optimizes the rendered lighting and shadow profile. You can find this feature located at the bottom right-hand corner of your photo or video effects screen.
Hyperlight affects the entire lighting profile of your image by incorporating the indirect effects of reflected light and highlighting subtle light variations. Tuning up the Hyperlight 2 Intensity slider also increases the number of calculated light bounces in the scene, allowing for silky smooth, accurately detailed lighting.
The following two images demonstrate how Hyperlight impacts the lighting profile of an interior:

Sharpness and noise, on the other hand, are straightforward image optimization features, both of which you can use to enhance the realism of your image. For instance, toggling the noise effect introduces artifacts throughout the image, thus simulating the natural imperfections found in a photographed image. Turning up the sharpness level enhances virtually all of the tiny details and makes edges and material details sharper.
Before You Render the Final Image…
With regards to the image quality settings and your effects stack, you’re definitely ready to render your image. Nevertheless, there is one final thing you can do to introduce a greater level of realism, life and vibrancy into your render.
Step 10: Detail the Scene with Objects for a “Lived-in” Look
Adding and tweaking effects are critical in producing a client-ready, professional-looking interior render. Yet, when it comes to creating a dynamic scene, one that tells a story and pulls your audience into the spaces so that they can feel the environment…well…you need to simulate a lived-in space, one that represents the human experience of living there.
Lumion offers a vast inventory of high-definition objects in its library, ranging from interior furnishings to things like food and drinks. By taking advantage of this object library, you can easily and quickly create lived-in spaces. For this post’s render, intelligent and comprehensive object placement enhances the level of detail and a sense of real-world location.
As a result, the final render is the one we started with. Clean, beautiful, professional.

The path to quality render creation is a unique experience based on the type of project, the models you used, the scene you created and your very own rendering style, among countless other factors.
This guide shows some insight into the Lumion rendering and workflow process, helping you find new solutions to your architectural rendering problems and take advantage of everything that Lumion has to offer. For further reading and support, here are several helpful resources:
- 3 Tips for Rendering Context for Landscape Architects and Urban Planners
- How to Bring Beauty to Your 3D Interior Renders
- Beautiful Renders within Reach
- Technical support available at our Support Center
- Get started rendering with our helpful Tutorials
Rendering the interior living room is the first part of our three-part series, “How to Render a Beautiful Scene.” Next week, we’ll be showing a step-by-step guide on rendering a dramatically lit, interior conference room. Make sure to stop by!
Discover the full power of architectural visualization with Lumion 7, available as a free trial here.
#Lumion