Lumion BLOG
Feel the space with Lumion
Sketch, tilt and render: what’s possible in Lumion 8
TweetShareShareShareGet clients to feel the spaces you designed with these 6 incredible new features in Lumion 8.

With only the Styles button, Sky Light and the Soft and Fine Shadows features, you can give your designs a striking level of realism in a matter of seconds.
However, there’s much more to Lumion 8 than initially meets the eye. In this post, you can explore 6 amazing new features and discover how they’ll help you and your clients feel the space like never before.
1. Achieve a “hand-drawn look” with the outline effect
There’s one problem almost every architect will face — you have a design concept that you need to communicate. Moreover, you need your audience to be engaged with your idea, whether they’re your colleagues, the principal architect(s) or a client.
With the goal of drawing focus on your project’s general shape and form, the new hand-drawn outline effect in Lumion 8 makes it easy to highlight the mass of your conceptual or “hand-drawn” designs.
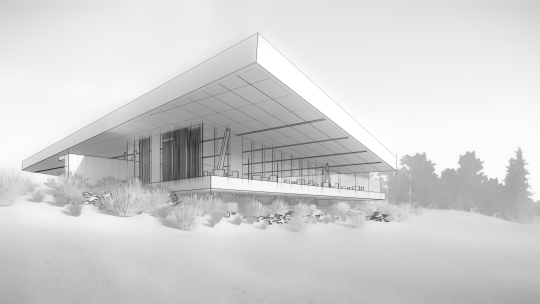
It’s the bones of your design, rendered beautifully and easily.
Of course, you can quickly create attractive black and white sketches with bold outlines, but that’s only a small facet of this versatile tool. In fact, the “hand-drawn” outline effect works really well with other effects if you consider it as a supplementary feature.
Just check out some of the different styles you can achieve:
Photorealistic sketch effect with outlines

Paint effect with outlines
Watercolor effect with outlines

Color sketch style with outlines

Cartoon effect with outlines

Getting the right amount of balance with the outline effect takes practice. More often than not, it takes playing around and toggling sliders until you reach the desired result.
For more on the hand-drawn outline effect, you can watch the tutorial below:
2. Easily compare model and material variations
Lumion 8 is positively a workflow powerhouse. The goal — to help you render faster than ever and cut down your production time (increasing the amount of time you have to work on your design).
And when showing multiple design options, whether material or model variations, the new variation control effect lets you easily show multiple design variations in the same animation.

With this feature, you can compare multiple options for materials and models. Your clients will find it convenient when balancing a range of concept options and choosing a look they can be satisfied with.
For instance: Which will your client like more, Design A?

Or Design B?

With the new model and material variation feature, your clients can easily make a decision they’re satisfied with.
And this feature is not solely for showing multiple models or materials so your client can make a good choice. This feature is also helpful for you, the architect, as it speeds up your workflow when researching and applying the best design solutions.
To better understand how to add model variations, refer to the tutorial video below:
3. Soften hard edges for improved realism
In real life, the edges of any surfaces generally appear slightly rounded or worn. They are never perfectly sharp.
With the new edges slider, found under the Weathering tab of a material’s settings, your model will take on a more natural and weathered look, one better representing the real qualities of physical homes and buildings.

Impart age and realism by smoothening the edges of adjacent faces. Soften the corners of brick, concrete, wood, metal and other materials.

For a good pairing, consider applying the Edges slider in concert with the Weathering slider. Both of these tools tackle the natural age of your structure, as well as things like erosion and deterioration, and finding the right balance can have a huge impact on the overall “feel” of your structure.

4. Tilt shift — the art of shallow DOF
There’s something about a physical, scale model that computer-generated renders can’t replace. But what can’t be replaced, can be simulated.

By applying the new tilt shift effect in Lumion 8, your design becomes part of a miniature world. It takes on the look of a maquette complete with trees, landscape and other context.

Properly using the tilt shift effect can transform your CAD model into a scaled-down version of the real thing, and the results are eye-opening.
To make the most out of using tilt shift (found in photo or video mode), the first thing you need to do is get acquainted with how this effect is used in photography. A simple search should elicit an endless stream of examples, as well as insight into how this effect is best used.
For instance, many effective tilt shift images include a viewpoint above the model or the scene’s subject. Once you choose a viewpoint looking down on your model, you can adjust the Tilt Shift effect settings to fine tune the model’s miniature appearance.

Whether a home or building, or a large scene such as a city center or a landscape design, tilt shift offers an engaging perspective into your design. It helps you quickly realize your vision for the finished work, presenting it as a simulated, scaled-down model.
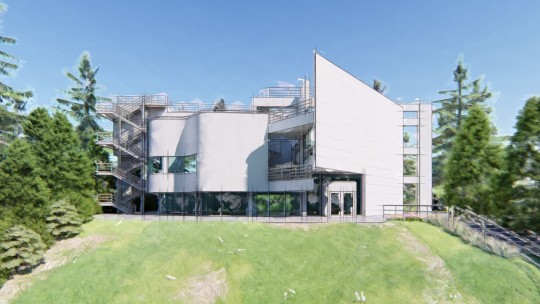
5. Render video in 4K resolution
There’s a simple solution for energizing your architectural movie and transforming it into an ultra high-definition work of art — 4K rendering.
To see how 4K video infuses a “whoa” component into your render, you’ll need a 4K monitor. If you do have one, then watch the video below with the 4K viewing enabled:
The above video was rendered in 4K. Make sure to turn the YouTube resolution settings to 4K when watching.
Ultra HD (4K) rendering is available in Lumion 8’s movie mode, and it showcases the light, shadows and details of your model at the highest level of image clarity available today.
Give your projects a visual edge that just can’t be replaced.
6. Mass placement for curved shapes
Landscapers rejoice!
In Lumion 8, you can now use the mass placement feature to instantly place numerous objects in complex shapes, including curves.

As one of the most popular tools for instantly building realistic-looking context while saving a ton of time, the mass placement tool helps you landscape and plant hundreds of trees, add people and cars and more.
With just a few clicks, you can plant multiple trees that follow the winding curved contours of your garden design or a city path.
The new mass placement tool is surprisingly easy to use. The first step is to place a mass placement line like normal:

If you hit Enter on your keyboard, you will complete the current mass placement line and start a new one.
To continue adding nodes to the same line, hold CTRL and add the next section of your mass placement line.

To set the smooth corners, hover over a mass placement node until the Corner Smoothness dialogue appears. You can set the smoothness from 0% to 100%.

With the new mass placement tool in Lumion 8, you can mass place objects in any winding shape you like.
Learn More About What’s New in Lumion 8
From “hand-drawn” rendering effects to workflow boosters, Lumion 8 is brimming with new features to help you communicate your architectural vision in the best light.
For more information about what’s available in Lumion 8, visit the What’s New page.
#Lumion