Lumion BLOG
Feel the space with Lumion
5 new tools for saving time and energy in Lumion 8
TweetShareShareShare
Less time spent rendering means that you’ll have more time to focus on perfecting your design.
At its core, Lumion 8 is a serious upgrade when it comes to your render’s image quality and visual attractiveness.
Features such as Sky Light and the Soft and Fine Shadows made this dramatic quality boost possible, but it’s important to remember the other pillars of Lumion rendering: speed and ease-of-use.
By applying these five time-saving features new in Lumion 8, you can tighten your rendering workflow and start knocking out amazing renders in a quick, efficient manner.
An example of a Lumion workflow
Before jumping into these time-saving features, it can be valuable to take a step back and consider workflow for a second.
In his recent webinar about Lumion 8, Lumion aficionado Mike Brightman described his process for rendering a demo model.

An example Lumion workflow, from building a 3D model to rendering.
The above image serves as a great example of a workflow that you can use for your own designs.
The text of the image is as follows:
- Build 3D model - SketchUp, Revit, Rhino, etc.
- Import - Place at 0,5,0
- Texture - Swap with Lumion textures, or assign Lumion texture properties
- Entourage - Place trees, objects and people on the corresponding layer
- Light - Add interior and exterior lights to the corresponding layer
- Cameras - Pick the views using appropriate focal lengths
- Effects - Choose a Style, or load your custom blend of effects
- Render - Export stills, animations, virtual tours and virtual reality
Keep in mind that you may have your own rendering workflow that works best for you, but if you’re ever unsure of where to start with your render, this list can serve as a quick way to get back on track.
Instant urban context with OpenStreetMap
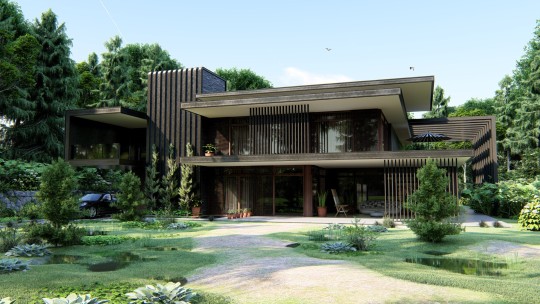
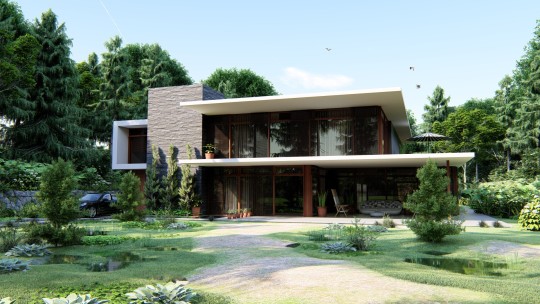
To get a better idea of how the improved OpenStreetMap (OSM) feature can help you work faster and smarter, let’s take a peek at the following image.
Here’s a nice residential building that’s been texturized and optimized for rendering. However, there’s just one critical problem: the green horizon and how it gives the building an eerie, otherworldly background.
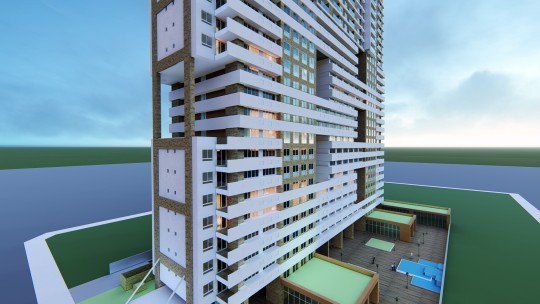
While the above render is certainly capable of communicating the building’s design, the green horizon makes it difficult to place this building in a real-life setting. Will the building fit with its surroundings? Is it planned for construction along the waterfront, in a large city or somewhere more obscure, like in the desert or the mountains?
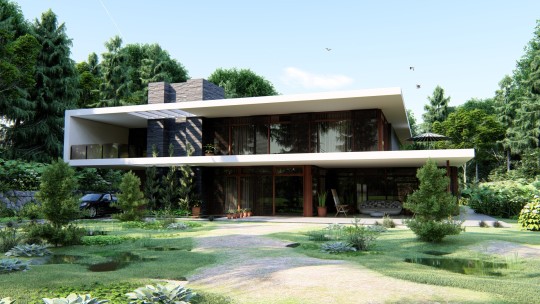
When surrounding your design with urban context, the OpenStreetMap (OSM) feature instantly places it in a real-life setting, whether that’s New York, Los Angeles, Toyko or elsewhere.

With a series of improvements made to this time-saving functionality for Lumion 8, it’s now even easier to control the context and ensure that your model fits precisely within the environment you want.
Adding the OSM building data is surprisingly easy. First, locate the OSM feature in the lower left-hand corner of your Landscape options in Build Mode. Click the On/Off switch and voila - instant city.

Okay, maybe it’s not that easy. But pretty close.
After turning on the OSM, the first step is generally to click on the GPS coordinates and then choose a place on the map. For this example, we used the southern tip of Manhattan.
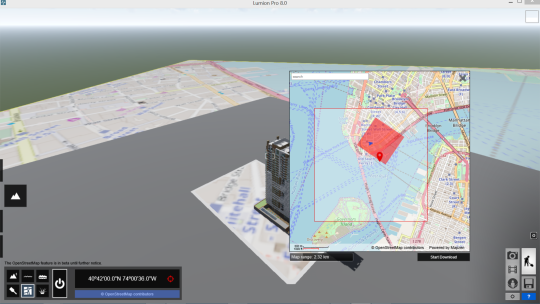
Click Start Download and OSM will then import the building height data of the selected area.
If you look closely at our residential building, you’ll notice that the OSM building data and the model have overlapped. Where OSM stops and the building begins, who can really tell?
This is where the new OSM improvements for Lumion 8 are helpful; you can now take complete control of the imported context. Simply locate the Edit button next to the OSM coordinates and you can take advantage of several editing features, including:
Hiding buildings
Moving the map

Change the map’s height
Rotating the map
Other possibilities with OSM include changing the appearance of the buildings, editing the minimum building height and randomizing building height. For more on OSM, check out the tutorial below:
Compare material and model options with the Variation effect (Pro Only)
Animations are a powerful tool when guiding your audience through your design. In many ways, a great video helps people feel the spaces you’ve created in a way that’s just not possible with a static image.
In Lumion 8, you can use animations to show multiple design options with the new Variation effect.
Available only for Lumion 8 Pro, the Variation effect makes it mind-blowingly easy to assign multiple designs to different points in the animation. For instance, with the camera circling a residential building, you can show how the different design iterations fit within the scene you’ve created.
The three building designs in question include:
Design #1
Design #2
Design #3
So, which will you choose? Perhaps seeing these designs in a video will help:
Whether showing multiple options to your client or comparing the models for yourself to get the insight you need, the Variation effect gives you more information to help you easily choose the right model.
Move, rotate and scale multiple objects with the new grouping function
Trees, plants, cars, people. Furniture, lights, decorations and more. Setting up a scene to make your design look “lived-in” and located in a real-life environment used to take a considerable amount of time.
And there are few things worse than spending the time building a scene, only to have a small nuisance send you back to Step 1.
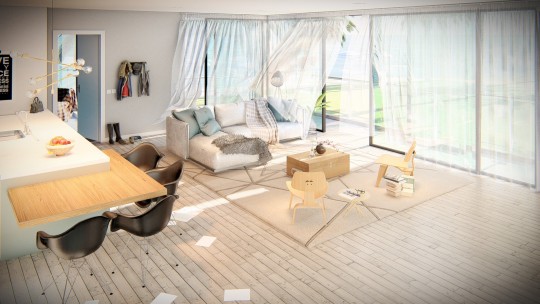
Take this living room assortment, for instance:
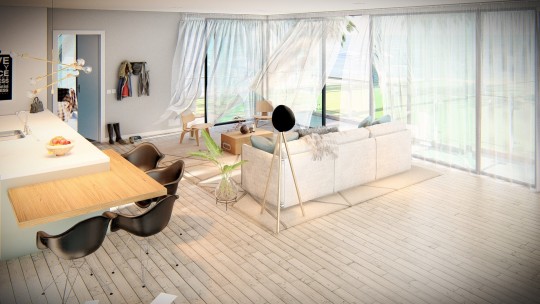
After showing the renders to your boss, she decides that it’s best to turn the entire living room arrangement around. “Literally, if you could just rotate this whole part, it’d be finished,” she says.
Without Lumion 8, this would be a hair-raising request. Fortunately, the new grouping feature lets you bunch these objects together and move the arrangement with its spatial integrity intact.
To group and rotate the living room arrangement, make sure you’re in Move Mode and select the objects you want to group together. Next, group the objects by clicking the “Create group” button.
The objects will then be organized into a single group that you can move, scale and rotate. Additionally, a “Group” dialogue will appear on the bottom of the screen, allowing you to:
- Add another object to the group
- Edit the objects that are already in the group
- Ungroup the objects
With the living room grouped together, it’s time to rotate. Simply locate and select the blue “tool” icon for the group and choose the “Rotate object” option.
…and render.
Instantly achieve curved shapes with mass placement
Ever since it was featured for the first time, mass placement has remained a widely popular tool that’s perfect for building context, fast.
New in Lumion 8, the mass placement tool underwent a makeover and it can now achieve curved shapes with smooth curves and corners.
With easy drag-and-drop functionality, placing multiple items of an object in a curved manner is fast and easy.
To use this tool, simply hold the CTRL key as you place mass placement nodes. After adding the nodes, click on each of the nodes and adjust the corner smoothness, thus giving you a clean and smooth curvature.
For more information regarding the new mass placement tool, refer to the tutorial video below.
Design iteration with the new measuring tools (Pro Only)
Real-time rendering is one of Lumion’s strong suits, giving you an inherent ability to fly throughout the model you designed and explore the spaces you created. CAD models imported into Lumion take on the specified parameters that you established in your modeling program, and, as a result, massing remains accurate.

By using the new measuring tool in Lumion 8 Pro, you can make quick measurement checks without needing to go back to your modeling software.
For instance, in the above image, you worry that the door behind the desk might not be tall enough. According to your 3D model, the door should be about 1.9 meters, but in the render, it just looks too small.
This is where the measuring tool comes in handy.
While in Build Mode, you can access the measuring tools as part of the “Lights and Special Objects” setting.
Open up the “Lights and Special Objects” dialogue box and choose the Utilities tab. Here, you’ll find the measuring object.
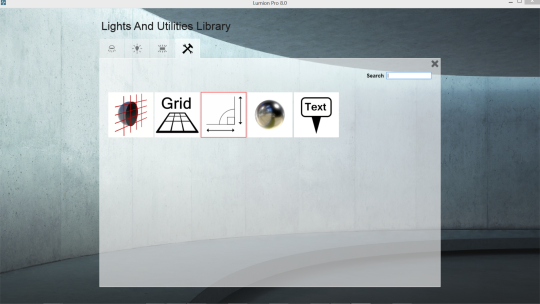
To use the measuring object, add the first node, click on the “Move object” icon and locate the measuring dialogue on the righthand side of the screen.
By clicking the “+” button on this dialogue, you can then grab the first node of your measurement and pull it to the desired height. The measurement readings will automatically appear.
According to the measurements, the height of the door is 1.9 meters; no need to go back to your modeling software for measurements checks!
Continue adding nodes where needed, such as when measuring the width of the door.
As workflow improvements, the on-screen measuring object and the grid object are super helpful for verifying distances as well as ensuring the precision and scale of your model.
Improve your render production with Lumion 8 tutorials and more
Making high-quality renders on Lumion 8 is only half the story. By leveraging these new workflow features, you can start making beautiful renders in record time.
Approach tight deadlines with comfort and confidence, and learn how you can render even faster by checking out other Lumion 8 tutorials or getting involved with the Lumion community on our forum.
#Lumion