Lumion BLOG
Feel the space with Lumion
5 new Lumion 8 features for elevating render beauty to new heights
TweetShareShareShareVisualize creativity like never before. Communicate architecture while captivating your audiences. See how you can capture your vision in the best possible light by applying these new Lumion 8 features to your designs.

For an in-depth look at how you can create jaw-dropping images or animations in Lumion 8 with these 5 features, continue reading below.
Simulate daylight with Sky Light
In spaces where the sun doesn’t reach, the Sky Light daylight simulator fills in the gaps. It’s one of the most advanced technologies new in Lumion 8, as applying the Sky Light effect instantly softens and diffuses the design’s environmental lighting.
Using the sky as a light source, Sky Light helps the color of foliage or the texture of your building’s exterior jump from the screen. Interiors suddenly gain an accurate sense of depth, massing and scale.
Truly, Sky Light’s impact on visual quality and realism is uncanny.
In the image above, we’ve toned down the colors and saturated the pale blue light. This is Sky Light in action, showing where the daylight simulator affects your scene.
In many ways, Sky Light is like coffee—turn it on and it “wakes up” your render —and you may find you can’t render without it.
Like the name suggests, however, Sky Light has the most significant visual impact when applied to exterior scenes or interior renders with abundant sunlight.
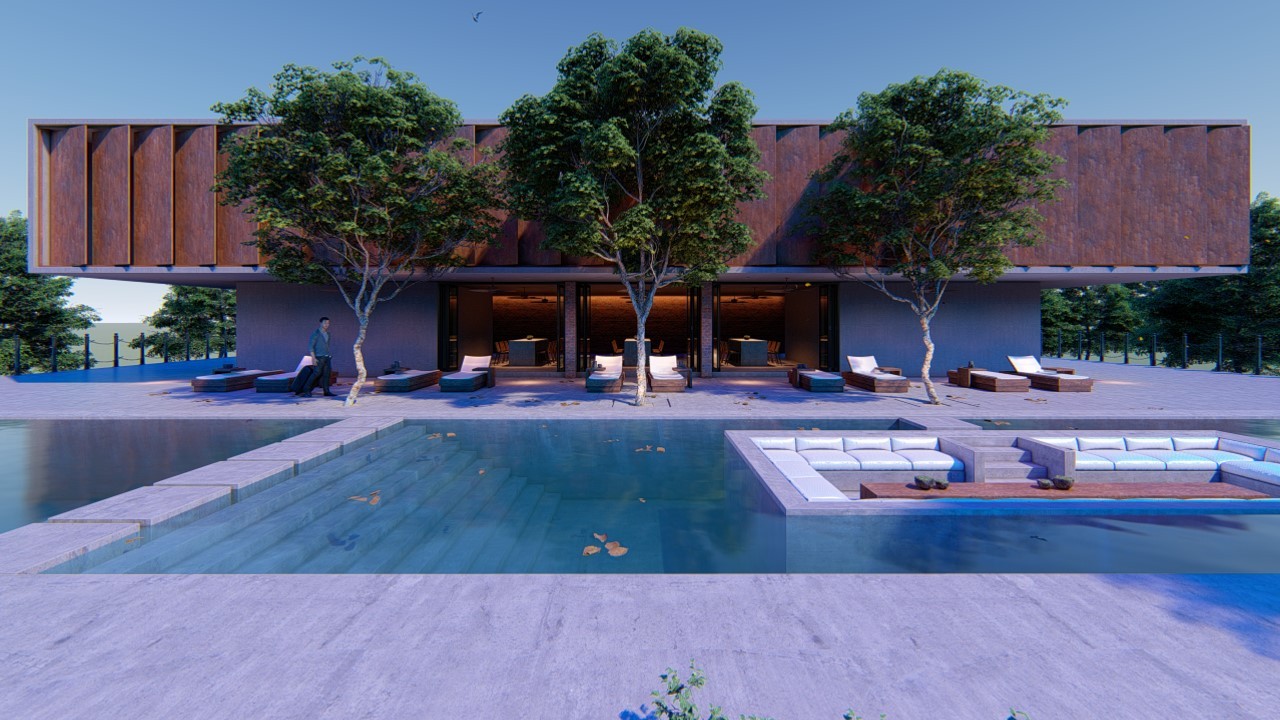
Sky Light’s impact on exteriors
No Sky Light applied.
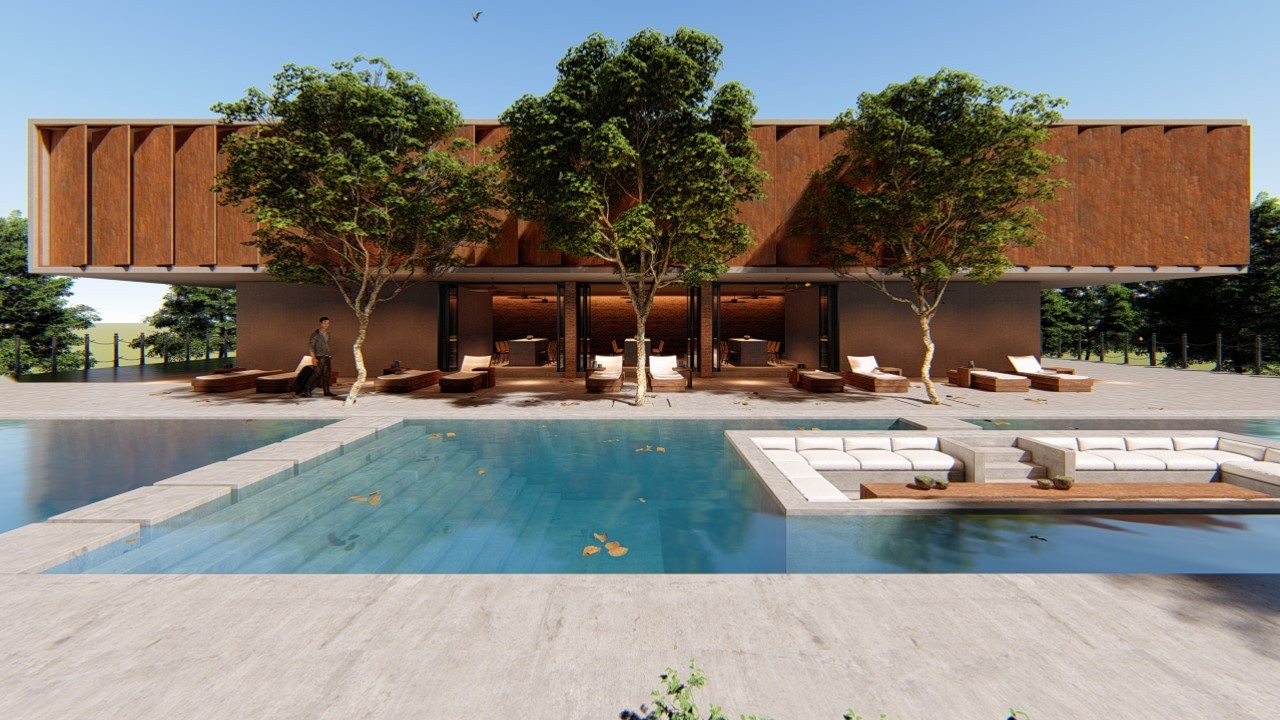
Sky Light brightness and contrast set to 1 (standard).
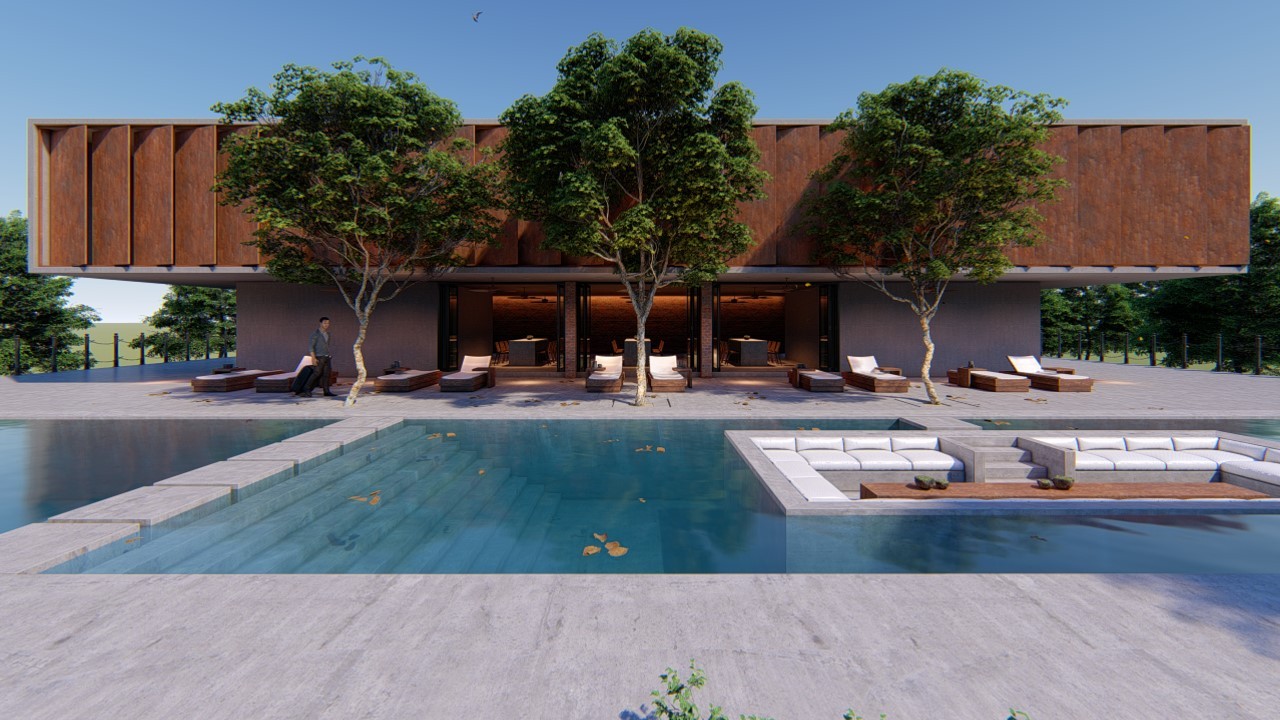
Sky Light brightness and contrast set to max.
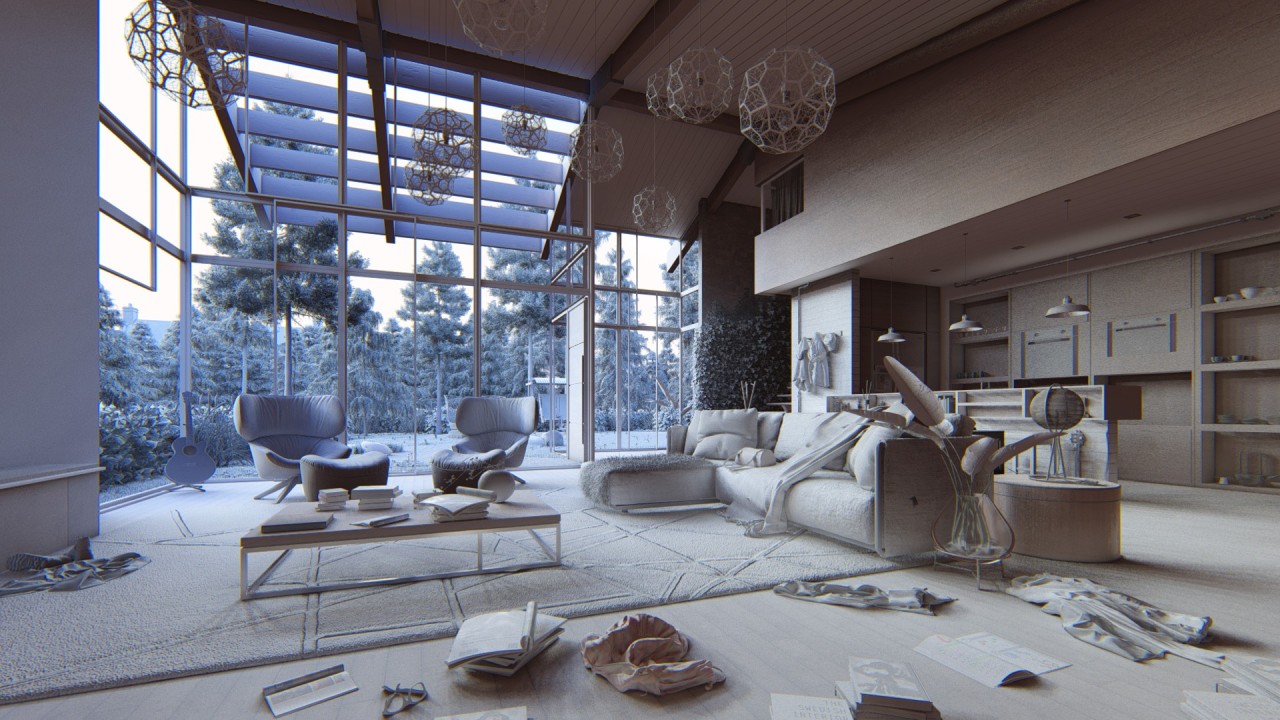
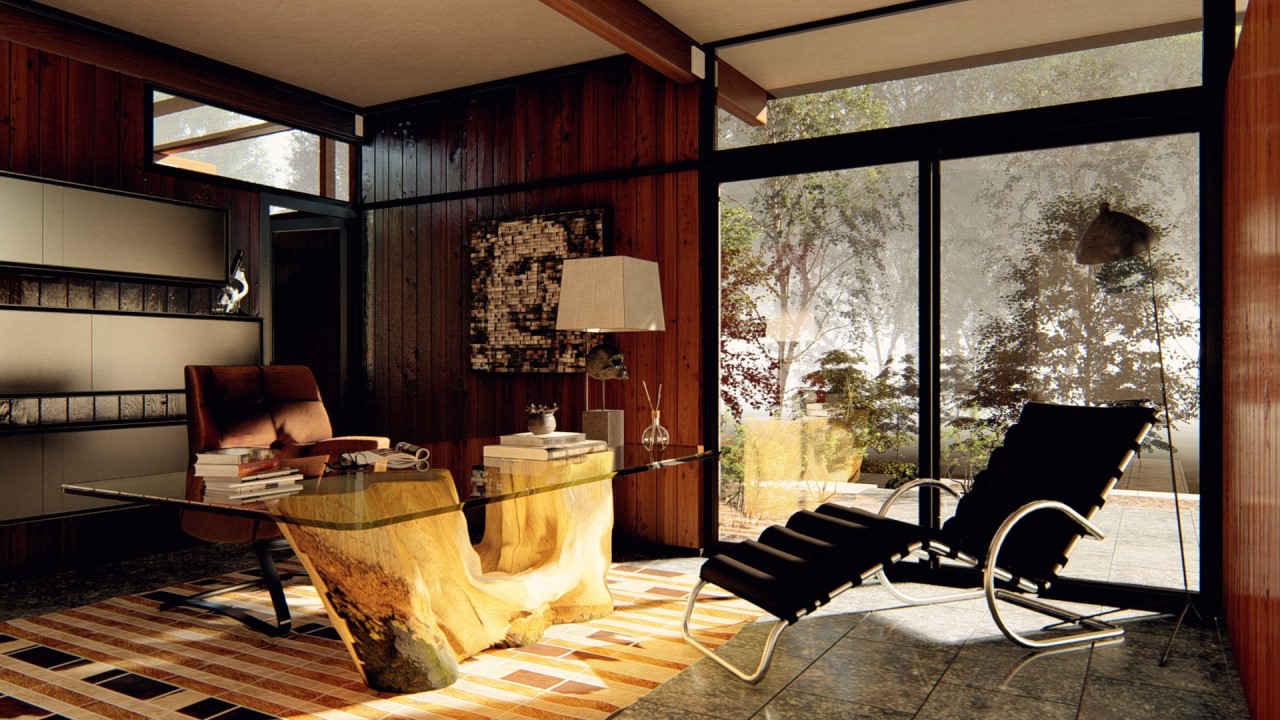
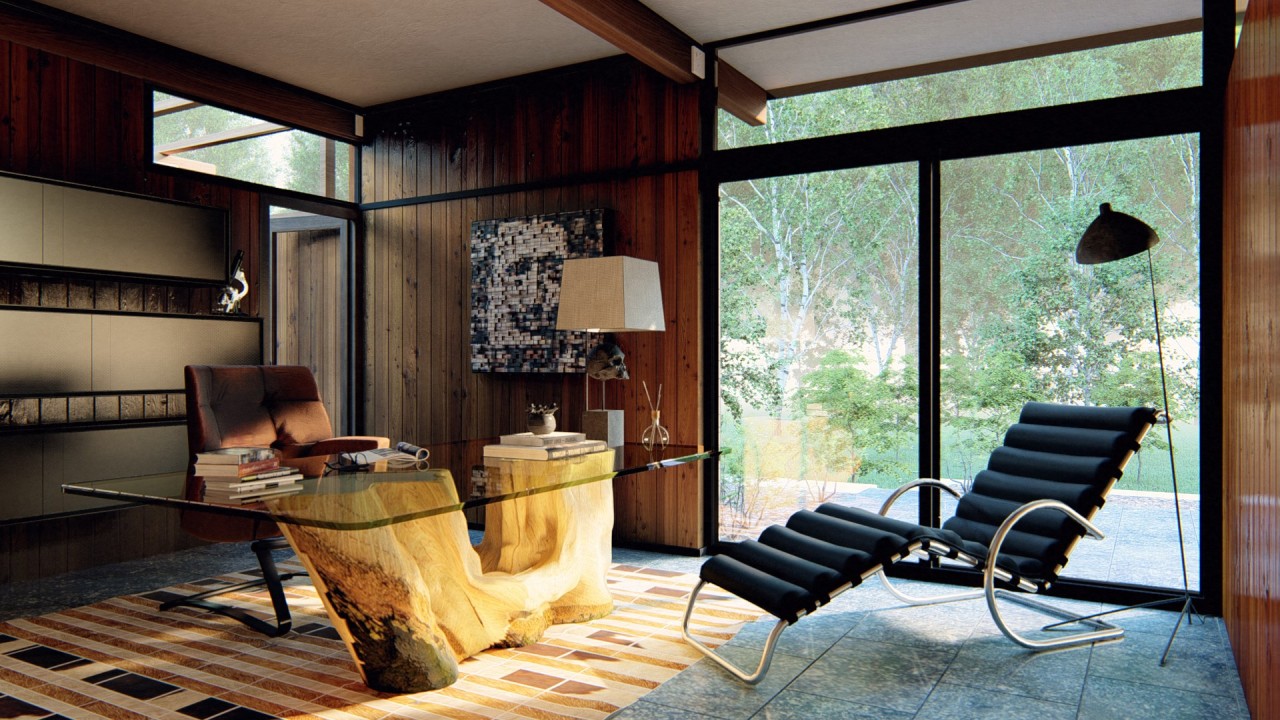
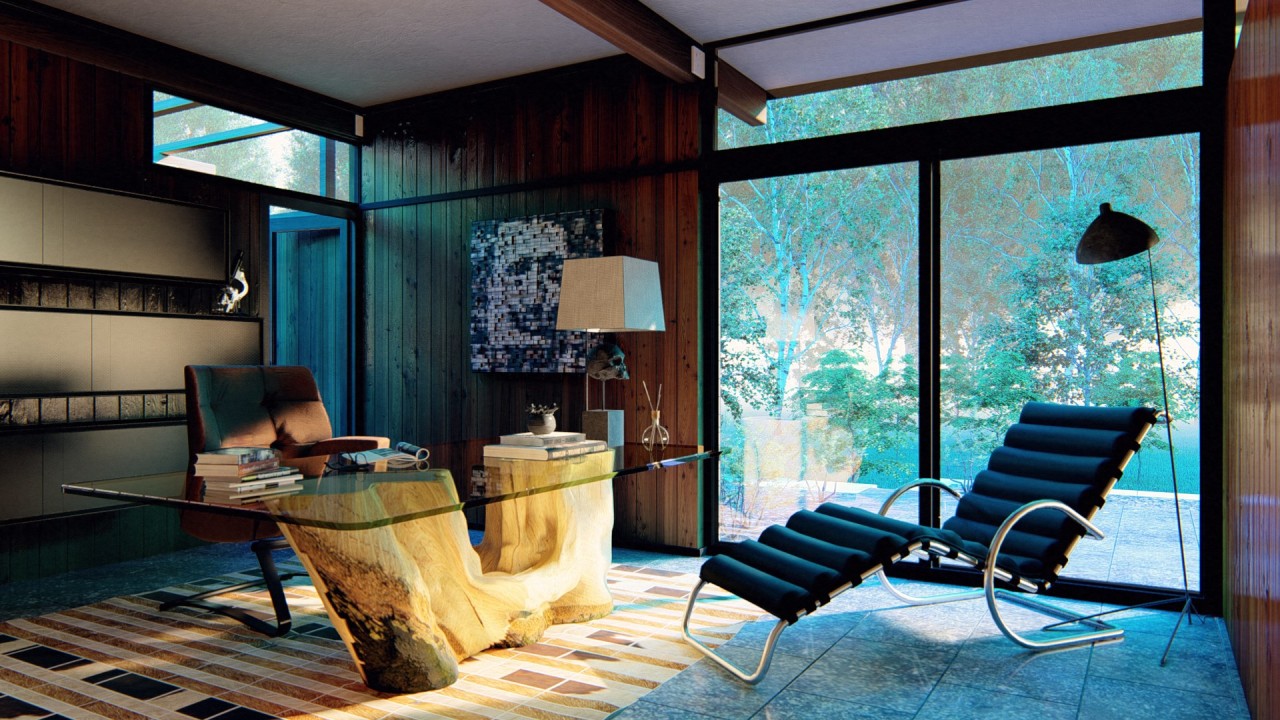
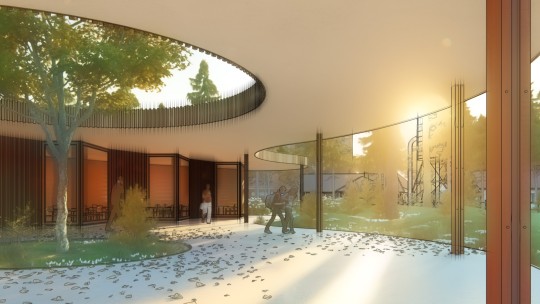
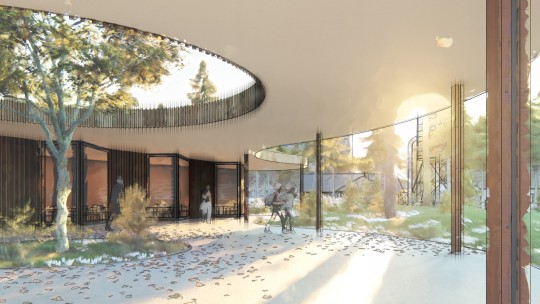
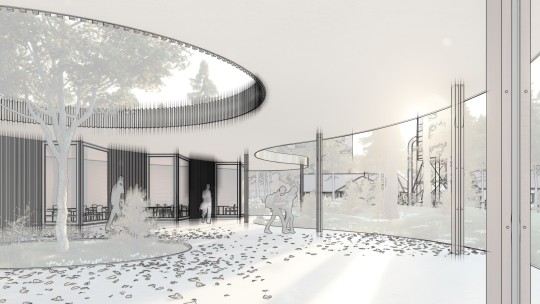
Sky Light’s impact on interiors
No Sky Light applied.
Sky Light brightness and contrast set to 1 (standard).
Sky Light brightness and contrast set to max.
Highlight every detail with Soft and Fine Detail Shadows
The Soft Shadows and the Fine Detail Shadow functions, found as part of the Shadow Effect in photo or video mode, have an enormous impact on visual quality and realism for both interior and exterior renders.
Like Sky Light, you’d be hard-pressed to find a situation where the Soft and Fine Detail Shadows don’t apply.
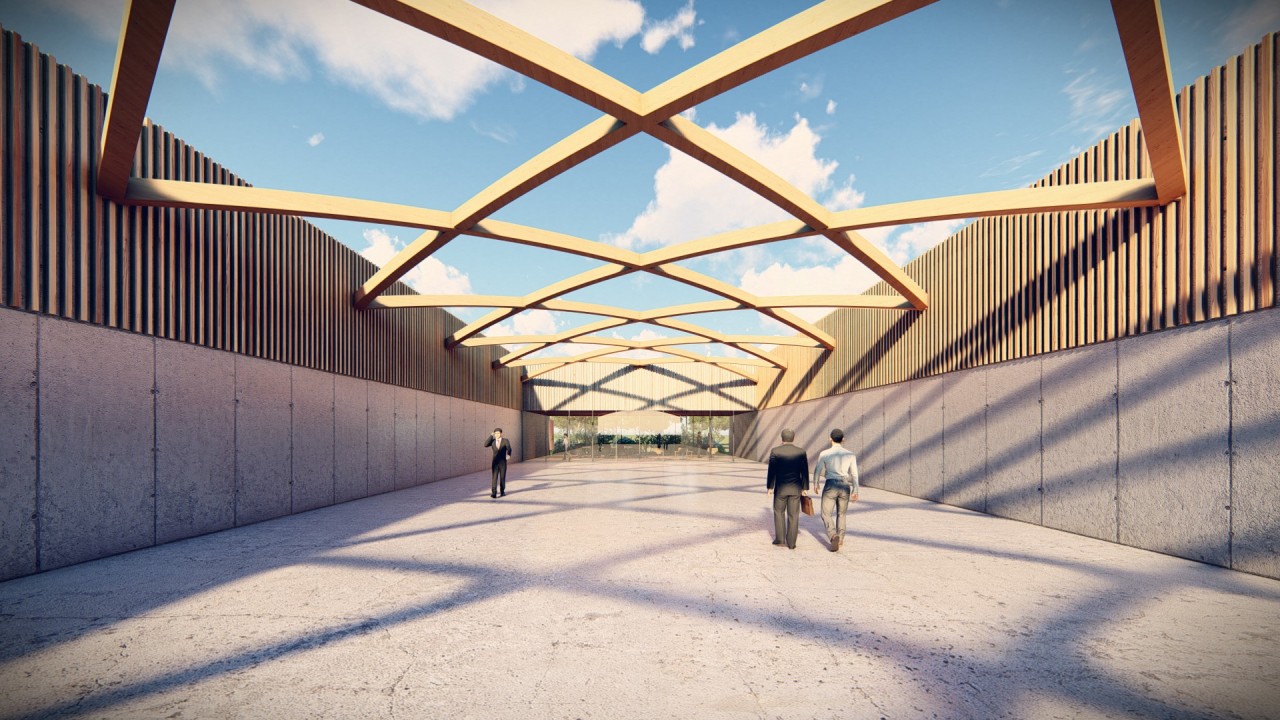
The above render includes the Soft Shadows feature. Instead of hard, dark shadows common in CGI, the Soft Shadows feature determines shadow density through a series of advanced calculations regarding light, objects and distance.
When it comes to the smaller, micro-objects, such as blades of grass or the leaves on trees, the Fine Detail Shadow technology steps in and sharpens these shadows, enhancing the sensory impact of materials and objects.
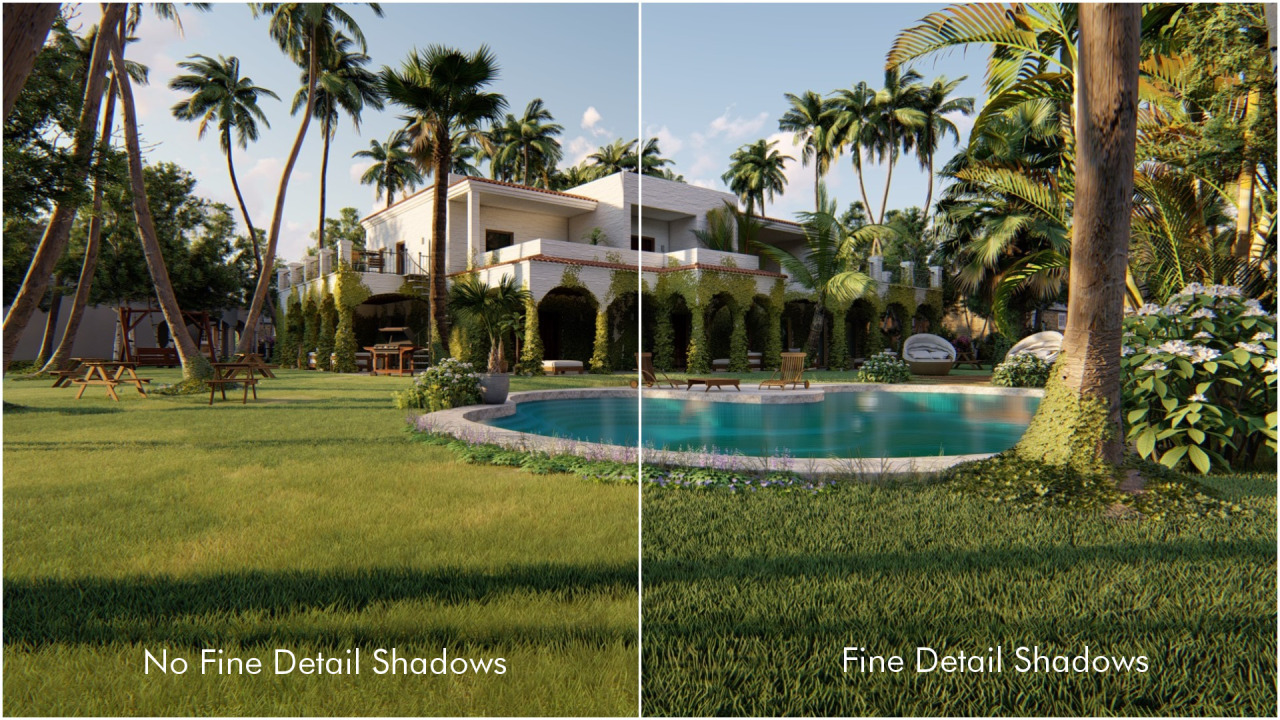
By turning on the Fine Detail Shadows, it’s suddenly easier to imagine what it feels like to walk barefoot across the grass in the above render.
Activate both features—the Soft and Fine Detail Shadows—and the resulting render is better suited to accurately communicate space, depth and distance.
More importantly, for many projects, these shadow technologies can infuse a “wow factor” into your design.
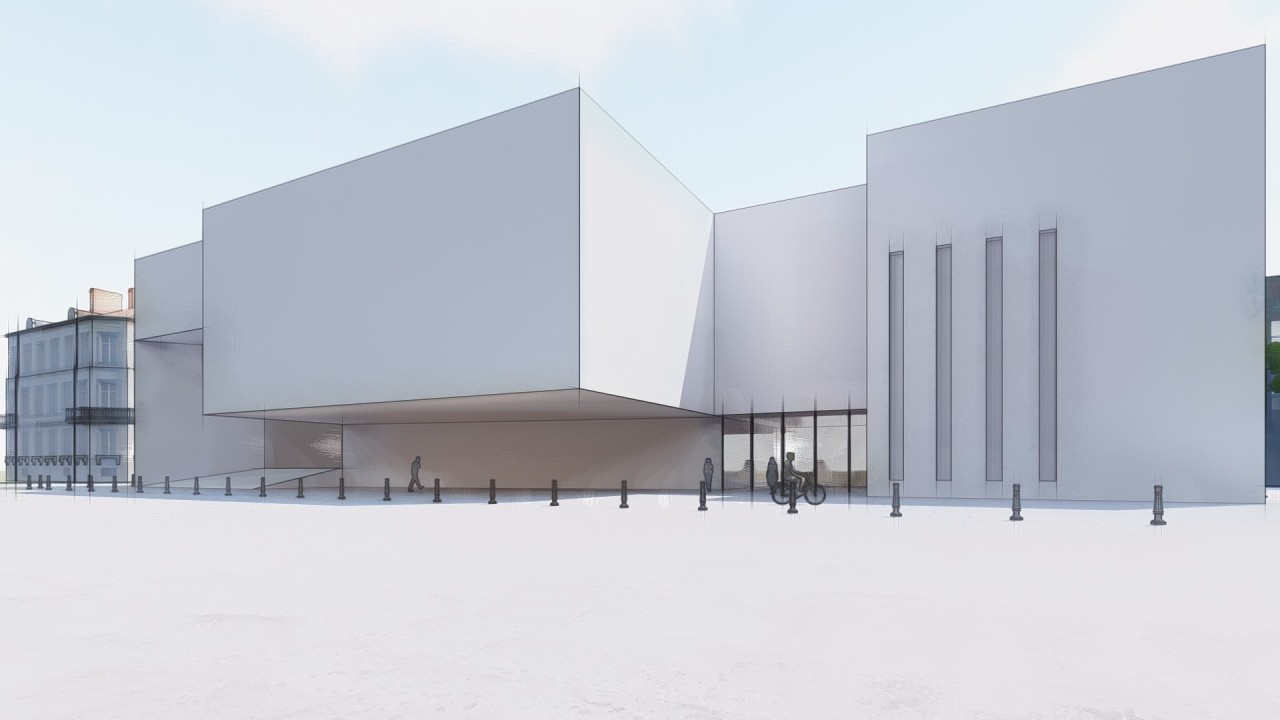
Concept rendering with the hand-drawn Outlines effect
Located within the Sketch effects in photo or video mode, the Outlines effect transforms buildings and spaces into conceptual, artistic renders by highlighting outlines, structural details and building facades.
Whether you’re in the early stages of design development or showing a client an interesting perspective, this artistic effect makes it easier to clearly communicate the form of your design and to draw a focus to your building’s general shape.
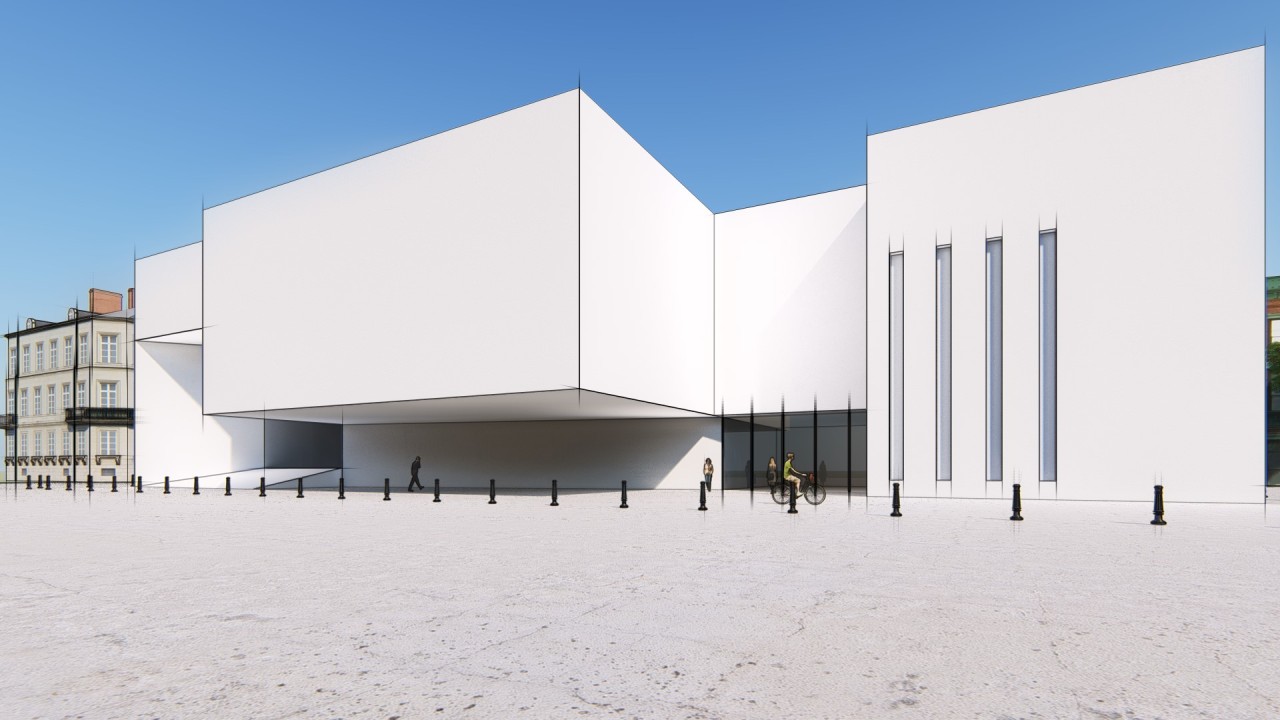
Adding the Outlines effect not only helps with communicating the three-dimensionality of the building, but it also guides the viewer’s imagination for the finished result.
The Outlines effect plays really well with many other photo or video effects. As a result, there are virtually endless possibilities when modifying the render’s style.
For instance, if you have a concept to show to your boss or client, but you don’t have time to enhance the render for a striking level realism, you can instantly access two Outlines-based presets from the Styles button, including:
Color Sketch Style
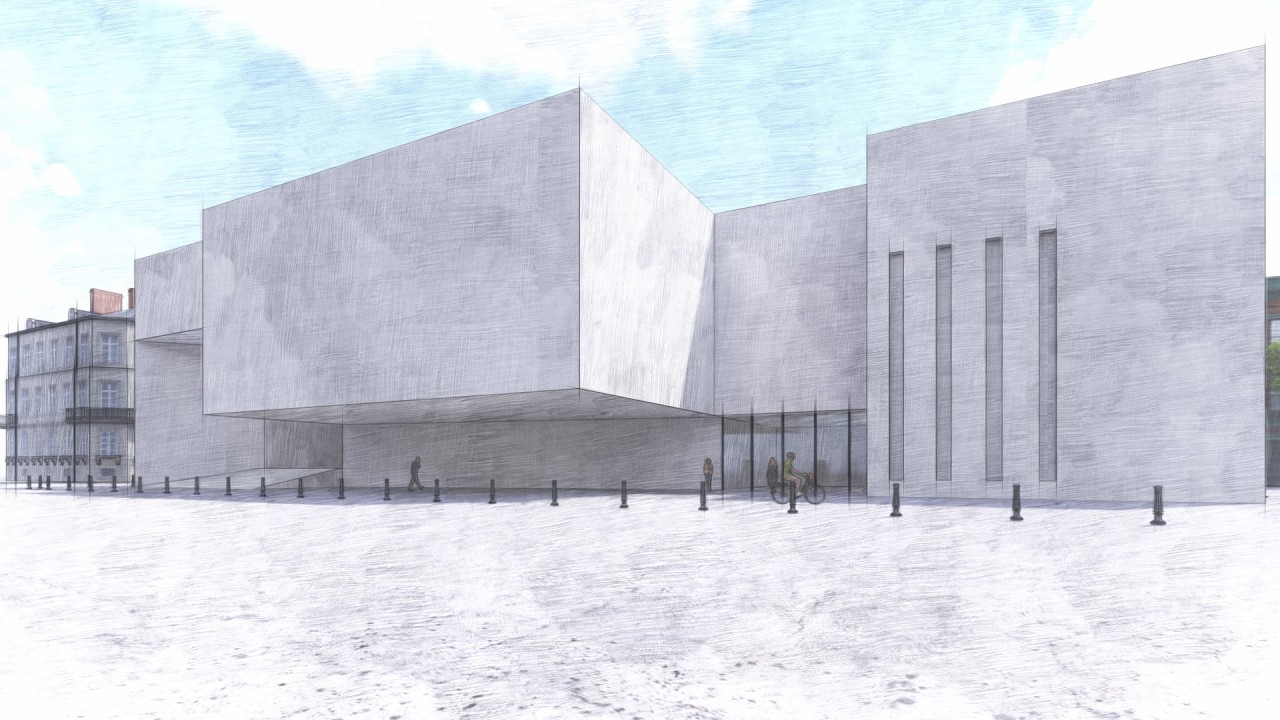
Watercolor Style
After adding textures, a couple of people and some context, we simply applied the Sketch and Watercolor Style for this instant, attractive result.
Have a little more time to create the perfect concept render?
As mentioned before, the Outlines effect works well with other effects and rendering styles. To give you an idea of the broad range of possibilities, here are three concept renders created using Outlines.
Concept render #1 - realistic with Outlines
Concept render #2 - painting effect with Outlines
Concept render #3 - Desaturation with bold outlines
Instant smooth edges with the edges slider
In real life, the edges of any surfaces generally appear slightly rounded or worn. They are never perfectly sharp.
With the new Edges slider in Lumion 8, you can control how rounded and soft you want the edges to look. This is a major factor for driving realism into your renders; your model will take on a more natural and weathered look, one better representing the real qualities of physical homes and buildings.
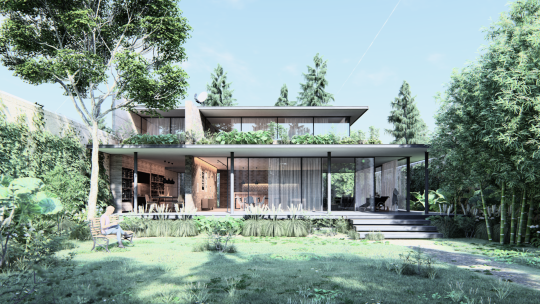
Just compare this render with sharp, virtually “perfect” 90-degree edges…
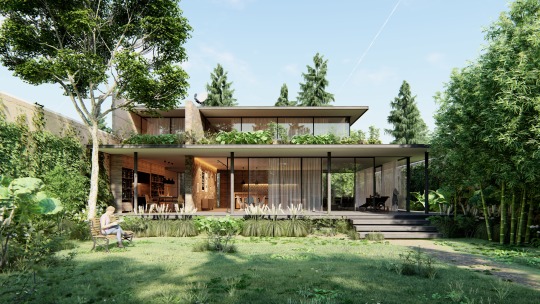
…to this one with smoother, rounded edges.
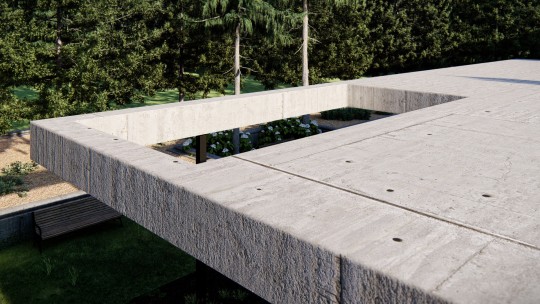
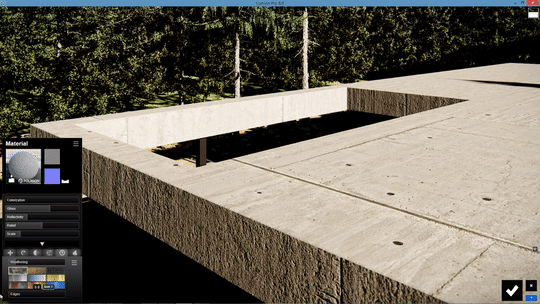
You can find the Edges slider as part of a material’s weathering setting, which is quite convenient as these two features complement each other. Dial up the Edges slider and add a little weathering for an effect that imparts age, general wear and environmental corrosion.
Pay attention to the edge closest to the screen. By dialing up the Edges slider, the angle becomes softer and rounded, enhancing the material’s realistic look in an instant.
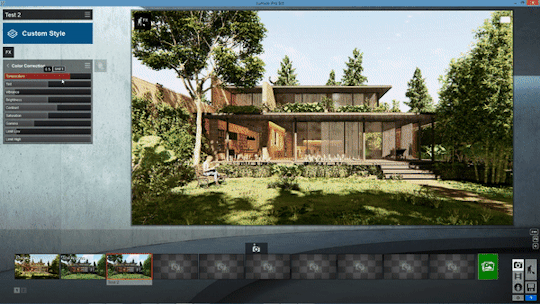
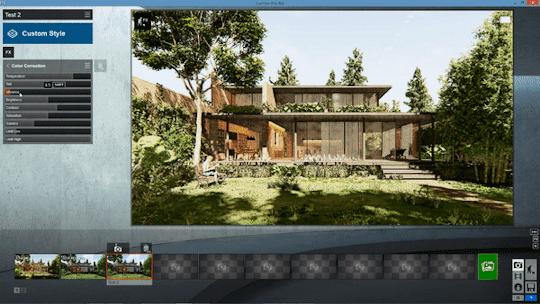
Transform a render’s look with color correction
Through several new improvements to the Color Correction effect in Lumion 8, you can easily dress your model in its best light and achieve virtually any look you want.
Whether that’s a colder, dramatic look or something a little warm and romantic, getting the color just right can have a major impact on both realism and style.
For instance, when looking at the following render, it’s clear that there are a few issues with the color. The scene is a touch too blue, the light is overexposed and several important details are washed out.
Fortunately, due to the Color Correction effect’s ease-of-use and multiple sliders, achieving a stunning color profile can be easy.
To fix the above render, we simply dialed up the temperature, added a little vibrancy and saturation and touched up the contrast.
Much nicer! With a little color correction, you can produce a beautiful render that’s sure to captivate your audiences.
The Color Correction sliders in Lumion 8 and their impact on your render are shown below:
Warm to cold with Temperature
From green to red with Tint

From dull to saturated with Vibrance
The other color correction sliders include:
- Brightness
- Contrast
- Saturation
- Gamma
- Limit Low
- Limit High
Find inspiration for amazing renders on our Showcase
By employing the various image quality effects in Lumion 8, you can elevate your renders to new heights in terms of realism, beauty and style.
Looking for a little inspiration on how to make the best render you can? Make sure to check out our updated Showcase for a slew of new images and videos produced in Lumion 8.
We’ve also been producing a “Featured Five” series on our Facebook page, showing off incredible renders from Lumion 8 users around the world. More images and videos are also available on Twitter and Instagram.
#Lumion