Lumion BLOG
Feel the space with Lumion
Photo-matching, drones and more!
TweetShareShareShareSee how Feature Graphics, an architectural visualization and schematic design firm based in Seattle, quickly photo-matches Lumion renders with scenes from around the city.
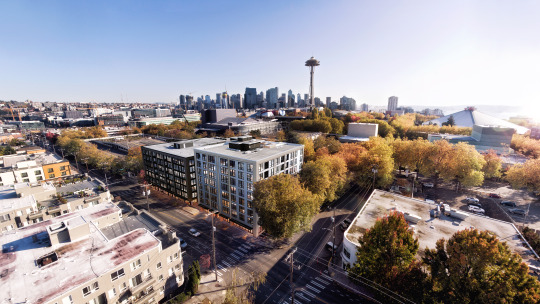
Aerial photo-match of the Center Steps Apartments. Photograph taken with a drone and matched with a Lumion render of the apartment building. Credit: Feature Graphics.
In architectural 3D rendering, context can be king.
Sure, clients want to see the building before it’s built, but some clients also want to see the building in the context of its immediate neighborhood. Others want to know what the real view from the building is like.
When preparing renders, one method for achieving realistic context is to create fully featured environments with trees, bushes, cars, people, bus stops, other buildings, etc.
And while Lumion makes context-building a pretty fast and easy process, there is another, quicker path to lifelike environments around rendered buildings:
Photo-matching.
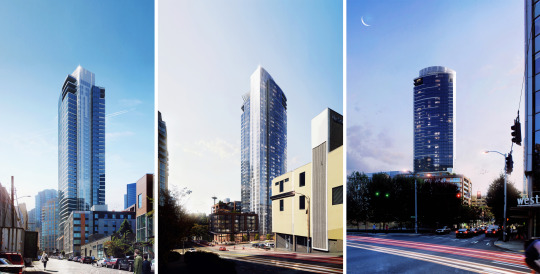
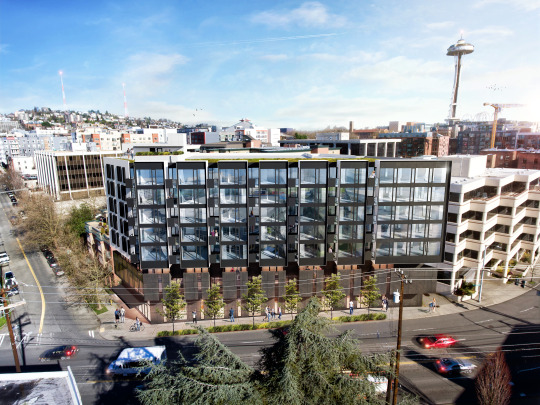
Photo-match of a high-rise. Photographs were taken from the street and matched with a Lumion render of the building.
Photo-matching is a technique used to insert a render into a photograph, merging these two elements together to realistically place your model in the context of its planned site.
In this blog post, we talk photo-matching benefits and processes in Lumion with Matt Fuhr, founder of the Seattle-based architectural rendering firm, Feature Graphics.
Photo-Matching With Feature Graphics
Feature Graphics is no stranger to quickly creating captivating, realistic renders. In Seattle and elsewhere, you can often find Matt photographing buildings from the street or, if you look up, you may see his drone shooting from the air.
When photo-matching renders for his firm’s clients, Matt says, “We’re using this technique to basically capture more accurate and more realistic context for the city and the general public to get on board with a project.”
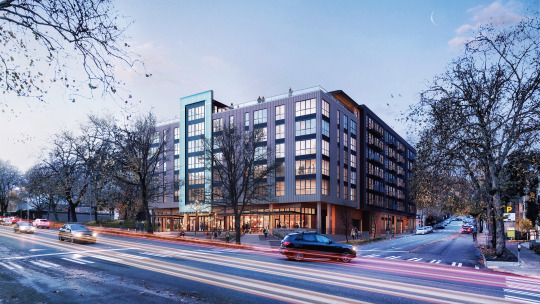
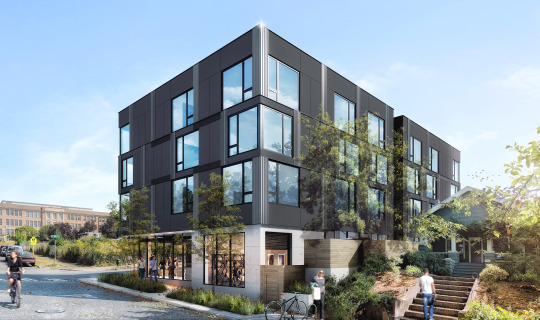
Photo-matched Seattle Center Apartments. Building rendered in Lumion 8.
While creating renders for the City of Seattle, Matt found that the various neighborhood design review boards would respond really well when they actually see landmarks, shops, and other things that are in the area.
How photo-matching can save time
“Usually, the architects will send us a 3D model that includes the building and the sidewalk, and that’s about it. When we do photo-matching, all we have to do is head to the site, take photographs, and then match the photos with Lumion. This takes a fraction of the time it would take to model the streets, surrounding buildings, and everything else immediately outside the scope of the site.”
Below are two renders showing the difference between modeling the building context vs. using site photography.
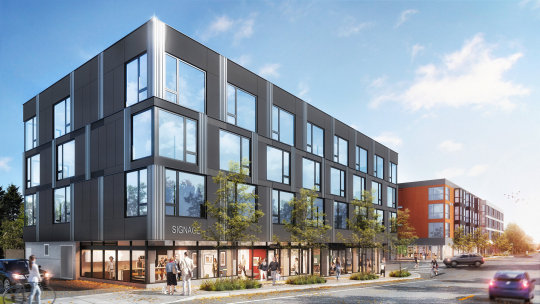
Image created by modeling and rendering the surrounding context.
Render photo-matched with on-site photography.
“The time that we’re saving matching Lumion renders with photos, instead of modeling 3D environments, has allowed us to stay on price point with a lot of international rendering firms,” Matt continued.
Using a drone to capture photos of the site
Another benefit of photo-matching is that it can help provide realistic views of the building, showing what the public will actually experience when the building goes up. This is especially true when photo-matching renders with images taken from a drone.
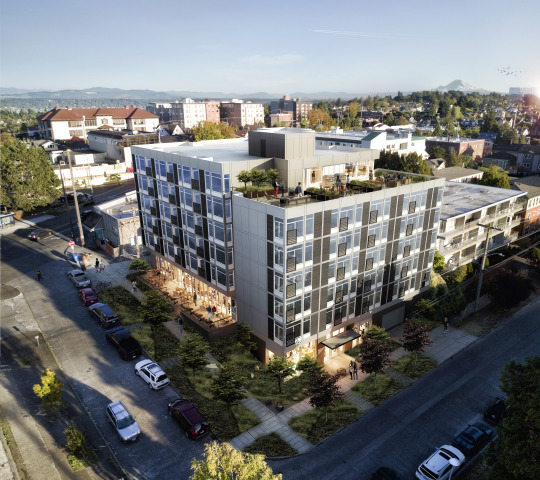
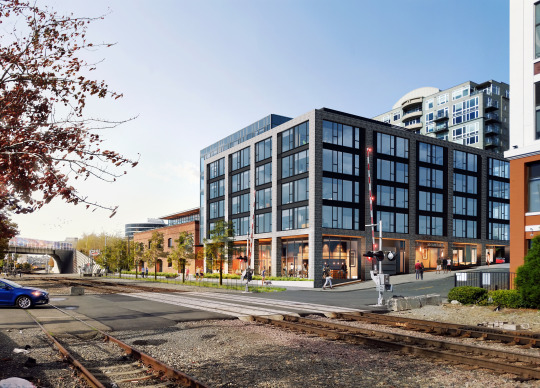
Photo-match of an apartment building. Photograph taken with a drone, building rendered in Lumion.
According to Matt, “More and more developers are looking for aerial shots to go to investors and get funding for projects. It’s really nice to have the first image of a project show the building zoomed out in the larger scale of the neighborhood and the city.”
“You can see that the project is close to these landmarks and its in this neighborhood of town, and it’s a great image to get people orientated to where the site is, and understand the greater context instead of just looking at it and saying, ‘Oh, this is how the building affects this block.’ It shows how the building fits in with the larger neighborhood it occupies.”
Photo-Matching Process with Feature Graphics
With regards to process, Matt said that the most important part of the process is blurring the edges where the photo meets the rendering.
“The point at which we blend the 3D model with the photograph is usually at the curb. It’s already, a harsh shadow line, so that’s a really easy place to cut the rendering and match it using digital tracing paper, but sometimes we go further back and blend the modeled sidewalk with the actual sidewalk, and obscure that with planting strips. Most projects around Seattle will have some type of landscape planting to put a barrier between the sidewalk and the street edge,” Matt said.
To match the colors and allow the Lumion-rendered building to perfectly mesh with the photograph, Matt will take the photos at the right time of the day to work with the renderings.
Sometimes, however, he’ll throw the model into Lumion first and complete a shading study to figure out the shadow alignments. He’ll also figure out how the building should be lit and the best time to go to the site and take photographs.
“It’s always key to have the shadows going the right way.”
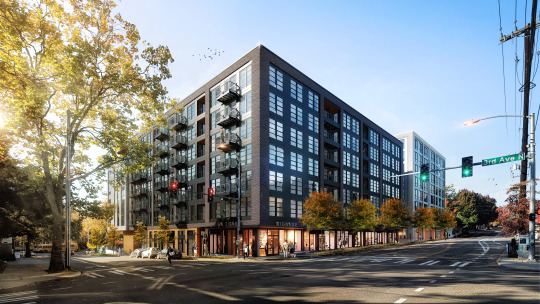
Photo-matched Seattle Center Apartments. Building rendered in Lumion 8.
With the photos taken, Matt uses a program called On Top Replica, which is essentially digital drafting paper, to line up the Lumion viewport with the photograph.
Want to learn more about photo-matching and other rendering tips?
The Lumion Support Center is a forum where hundreds of Lumion users and architecture and design firms, like Feature Graphics, are able to share renders and rendering techniques.
Want to know more about photo-matching? Here are two forum posts from Lumion users who have created their own photo-matching techniques.
Try Lumion for yourself and download a free trial.
#Lumion