Lumion BLOG
Feel the space with Lumion
Explore how this 3D interior animation render was made
TweetShareShareShareMaking videos in Lumion can be challenging. In this post, we’ll open up the hood and see what’s beneath this 3D animation of a Scandinavian living room.
Interiors are one of the most personal forms of architecture, and for good reason too. These are the spaces where people spend most of their time, and it makes sense that the design of the interior is reflective of the character and lifestyle of the inhabitant.
When preparing to meet with a client over a 3D interior design, architects and designers can use animations to capture the space’s personality in a very intimate, dynamic manner.
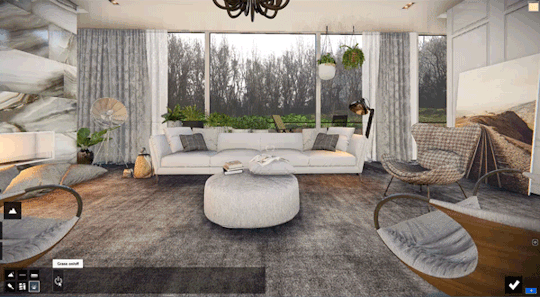
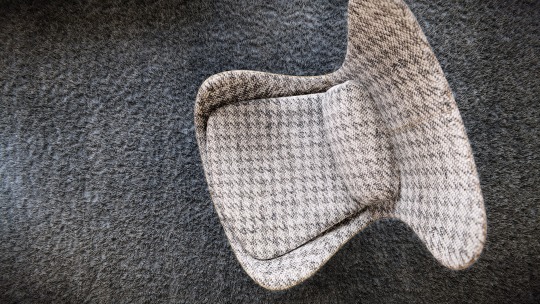
How to make this faux fur carpet
Often, it’s the little details that separate the ‘okay’ videos from the truly spectacular animations that’ll delight your audience. And while this living room’s furnishings and materials are modern and sleek, the faux fur carpet takes center stage.
So, you may be wondering, “Where’d ya get the carpet?!”
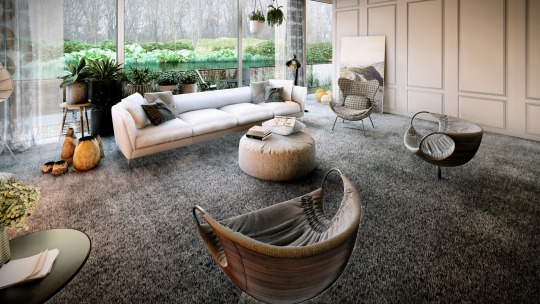
The big secret (or maybe not so big) to creating thick, soft carpets in Lumion is through the ‘Grass’ feature in the Build Mode’s landscape settings.
And yes, you read that correctly. The grey carpet you see in the video is actually colored grass in Lumion.
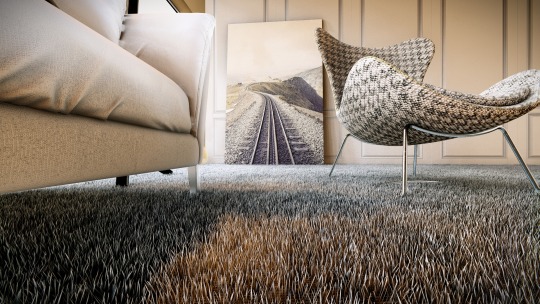
See the resemblance?
And creating this effect is quite easy.
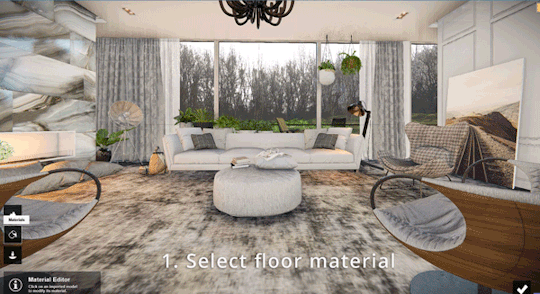
The first step is to mark the floor as ‘Landscape’.
Designating the floor material as ‘landscape’ will allow you to control the small nuances of the grass, including the color, grass blade height, grass density and wildness and so on.
To mark the floor as ‘Landscape’, make sure you’re on the Materials setting in Build Mode and click on the area you want to turn into a carpet. After selecting the floor material, locate and click the 'Landscape’ button within the Material settings.
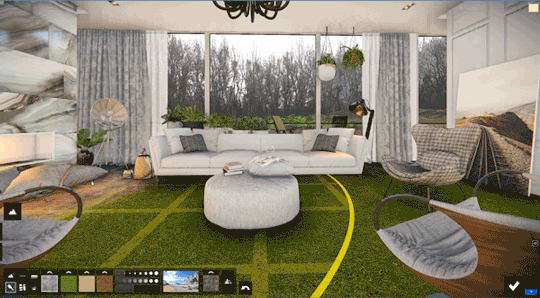
At this point, there is a good chance that your living room will have a wild terrain running through it.
To give it the fur carpet feeling, we should first change the color and texture of this material. Perhaps the fastest and easiest way is to use the ‘Paint’ brush in Landscape mode.
For this scene, we imported a Custom Diffuse texture to paint the floor.
The next step is to turn the grass 'on’ and adjust its characteristics.
Voila!
Although it might not be the ideal way to create a thick carpet material in Lumion, this technique does work, and perhaps it can help you explore different uses when assigning materials, painting landscapes or using grass in a creative way.
How to Create “The Mood”?
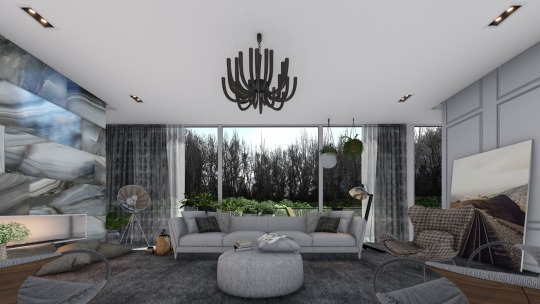
Mood is another essential component of making an effective animation. In fact, several Lumion users have stated that they make images and videos with the explicit goal of showing their designs with a certain “mood” associated with it.
For this animation, there is a bit of a darker mood. There’s fog lingering over the dark lake. The trees are bare, and their density creates a shadowy, innocuous feeling.
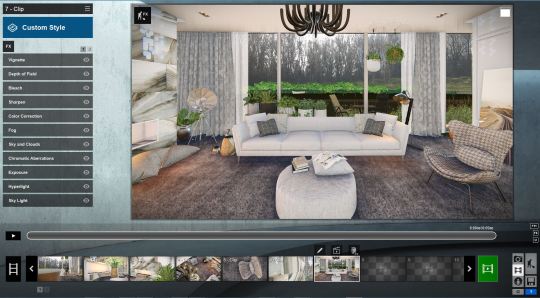
So, the question remains: how did we create this dark and stormy mood? Let’s go through the effects one-by-one.
Here is the scene without any effects (except for 2-point perspective):
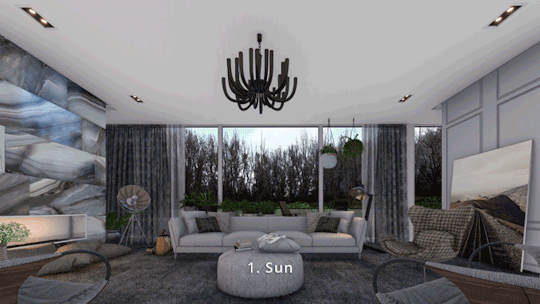
In the gif below, you can see how each individual effect slightly changed the look and feel of the interior. Starting with the ‘Sun’ effect, and ending with a little vignetting, you can see the iterative process we used to get the final mood for the animation.
The specific effect settings are listed below.
1. Sun
Height: 0.4796
Heading: -0.519
Brightness: 0
Size: 0
2. Shadow
Sun shadow range: 4000m
Coloring: 0
Brightness: 0.1043
Interior / Exterior: 0
Omnishadow: 3.0
Shadow Correction: 0
Soft Shadows: On
Fine Detail Shadows: On
3. Reflections
Flicker Reduction: 0.5
Reflection Threshold: 1cm
Preview Quality: Normal
Speedray Reflections: On
4. Sky Light
Brightness: 2.0
Saturation: 0.7662
Sky Light in Planar Reflections: On
Sky Light in Projected Reflections: On
Render Quality: High
5. Hyperlight
Amount: 39.2657
6. Exposure
Exposure: 0.5877
7. Chromatic Aberrations
Dispersion: 0.0390
Affected Area: 0
Safe shadows: 0.3442
8. Sky and Clouds
Position: 0
Speed: 0
Master cloud amount: 0.8100
Low clouds: 0.2078
High clouds: 0.4351
Cloud direction: 0
Cloud brightness: 0.1500
Cloud softness: 0.0500
Low cloud softness removal: 0.800
Sky brightness: 0.6331
Cloud preset: 1
Cloud high preset: 0.2500
Overall brightness: 1
9. Fog
Fog Density: 1.5289
Fog Falloff: 0.0020
Fog Brightness: 0.600
Fog Color: White
Color Brightness: 1
10. Color Correction
Temperature: 0.1944
Tint: 0
Vibrance: 0.7
Brightness: 0.5617
Contrast: 0.6396
Saturation: 1
Gamma: 1
Limit Low: 0.0028
Limit High: 1
11. Sharpen
Intensity: 0.435
12. Bleach
Amount: 0.074
13. Depth of Field
Amount: 22.5
Foreground/Background: 0
Focus Distance: 1.9m
Sharp area: 0
Auto Focus: Off
14. Vignette
Amount: 0.1
Softness: 0.8
How this 3D animation was made
There is no single, correct workflow when rendering a film in Lumion. You may prefer slow, panning clips to emphasize certain areas of a home, or perhaps you approach videos from the Hollywood point-of-view and run the gamut with multiple camera angles, special effects, artistic cinematography, emotional depth and more.
To communicate this interior, we rendered seven clips together with the goal of taking our audience on a visceral journey to trigger emotions and sensations, and to create an experience that’s more than simply “viewing.”
The entire, one-minute movie consisted of seven short clips rendered together. In many ways, you can think of each clip as a panel of a storyboard.
One could argue that you’d only need a few panning shots to effectively communicate the room, its materials, its view and so on.
But if you’re trying to pull your audience into the room, and let them feel the space for themselves, then it may be worth it to ask, “What exactly am I trying to communicate with each shot?”
Are you showing a fireplace, or are you trying to communicate a warm, cozy feeling?
Does your audience care about the design of the chair? Or is there something else you want to say about it?
Asking the right questions can help set up the foundations for making your video. It can give you direction regarding what you want to show, what you need to show and how you want to show it.
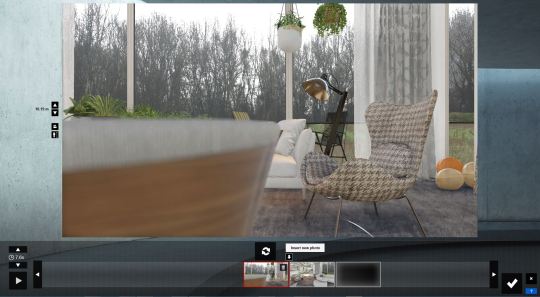
Pro Tip: For each clip, we rendered the camera pathway and then used the ‘Insert new photo’ function to precisely define the camera path.
Once you know what you want to show, and perhaps what emotions you want your audience to feel, the next step is to create each individual clip.
For this video, we rendered each of the clips below:
Clip 1
As the animation’s introductory clip, the scene starts from behind the chair and the camera slowly rises, exposing depth while giving the audience a basic overview of the room, the mood and its furnishings.
Clip 2
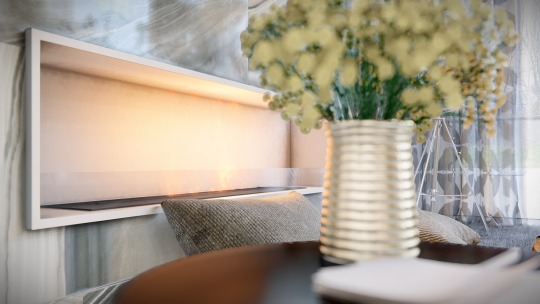
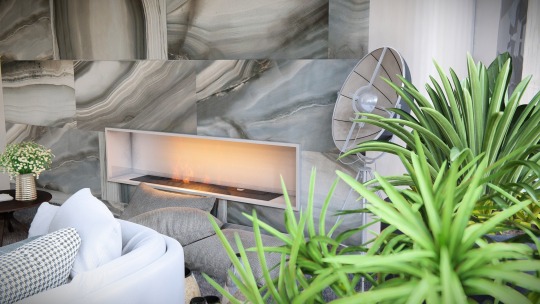
Following the overview shot, the next clip focuses on two elements, the flowers and the fireplace, before rotating around to expose the rest of the room from a different perspective.
Clip 3
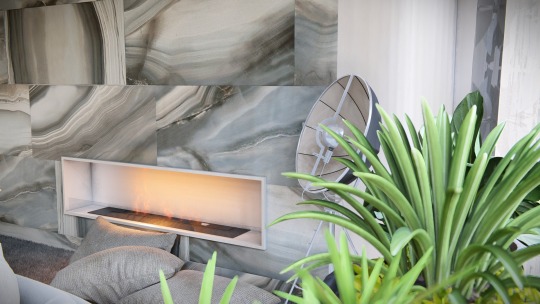
This clip shows the room from yet another angle - behind the couch. But with the goal of connecting Clip 2 to this one, we decided to start the clip focusing on the fireplace once again, creating a sense of continuity.
Clip 4
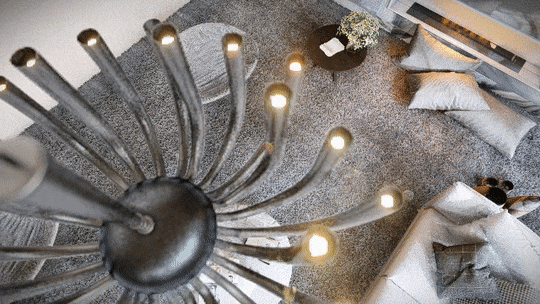
After the first three clips, we realized that we needed an entirely new perspective and to show the room from a different angle. It also seemed to be the right time to introduce the chandelier and give it a little attention (with the fireplace in the background).
Clip 5
Showing the chair was very important. Not only did it have a cool design that blended well with the other elements of the room, but it also serves as a point that’ll make people say, “I want to sit there!”
Remember, the average Joe/Jane might not understand interior design, but he/she will understand a chair and what it feels like to sit in one.
Clip 6
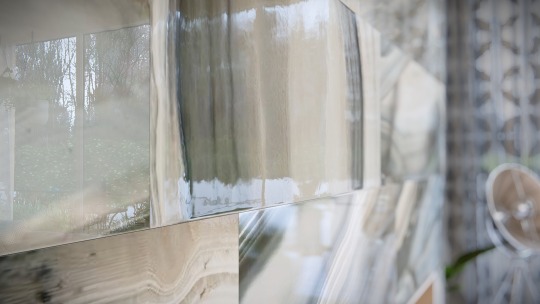
Another element on our “must-show” list was the reflective, marble tile material on the left-hand side of the interior. Like with the other shots in this animation, we wanted to do more than simply show the wall; we wanted the audience to “feel” this material.
By only looking at the above render, can you imagine what this wall feels like?
Clip 7
For the last clip, we wanted to end the video on a strong note, showing the entirety of the room from an all-encompassing, front-on shot.
Start creating blockbuster architectural videos!
When rendering videos, there is one thing you can expect: a sense of satisfaction when finished. Although you may have to update a clip, change the lighting settings or modify the effects, there is little that compares with watching your finished render in HD.
Looking for more Lumion video rendering help? Check out these tutorials below:
#Lumion