Lumion BLOG
Feel the space with Lumion
Move, vary and animate: breaking down the ‘Backyard Pool’ video
TweetShareShareShareLearn how to animate objects, switch on layers and alternate between model iterations in a single animation with this video breakdown.
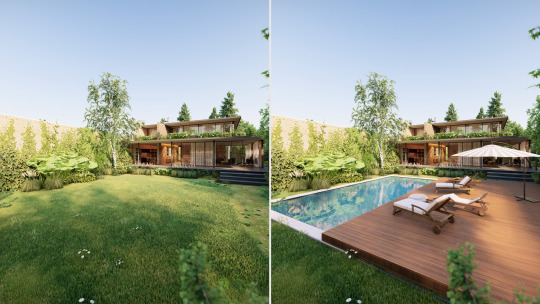
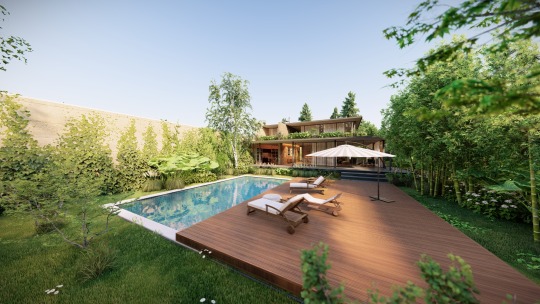
As the architect, you and the client might not always see eye-to-eye for every space in the house’s design. For instance, the client really wants a backyard with a swimming pool, a safety deck for young children, relaxing poolside seating and a lawn, but he/she can’t imagine how it’d all fit!
Fortunately, you’re armed with a great idea — a large, wooden pool deck that, with the help of a motor, can slide and cover the pool.
As an all-in-one tool, Lumion can help you engage your client with a creative, animated render. In minutes, you can animate the wooden deck and truly show the beauty of the backyard when it’s finished, all without third-party software.
In this blog post, we’ll take a deeper look at the ‘Backyard Pool’ video and explore how to thrill clients using features such as Variation Control (Pro only), Layer Visibility and Move.
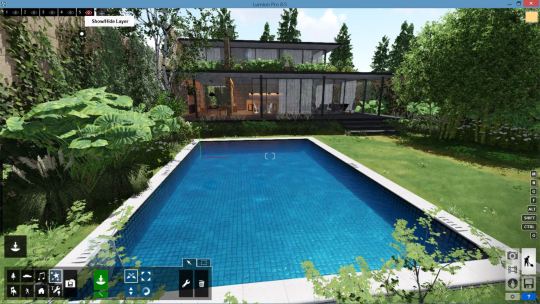
Setting up the ‘Backyard Pool’ scene
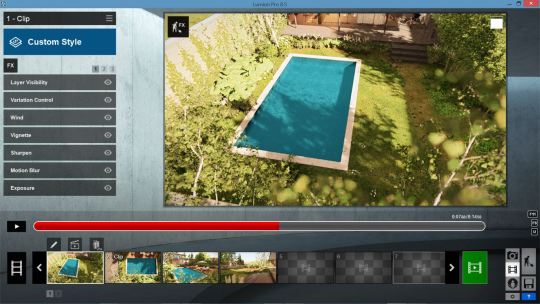
In Lumion 8 Pro, one of the new features was the Variation Control effect. Located in the ‘Scene & Animation’ effects in Movie Mode, Variation Control lets you easily show iterations of a single model or completely different models in the same video.
By using this feature, it’s quick and easy show a client how the addition of the swimming pool and mobile pool deck will impact the look and feel of the backyard.
So, let’s take apart a few elements of this animation and see how it was done.
Import the first model and add variations
The first step is to import one of the model variations. Generally, this will be the model that you’ll show first using Variation Control, though it can also serve as the principal, final design. No matter which model you import first, what’s important is how you set up the Variation Control effect later on.
Import the model as you would do with any other. In the Lumion editor, select the ‘Imports’ category and then simply click on the green button to locate and import the model.
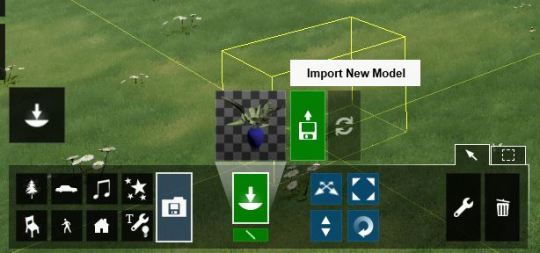
After importing the model, make sure to keep it selected (its node will be blue). This will allow you to import the variation.
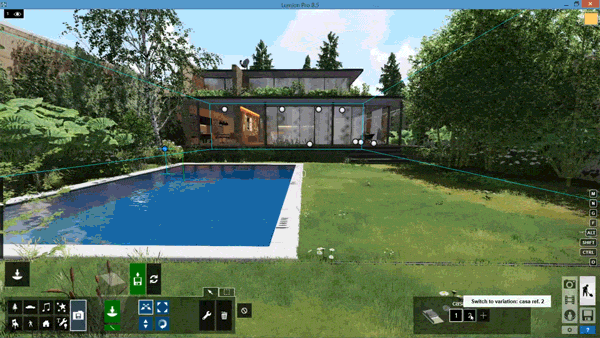
To add the ‘variation model’, locate the small dialog box in the lower right-hand corner of the screen. This is the variation control box, and it lets you import the building variations and then easily switch between them.
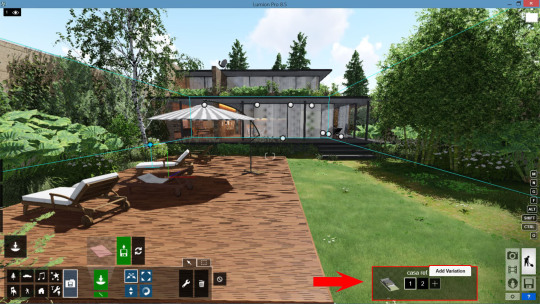
As you can see in the following gif, the only varying factor between the two models is the swimming pool.
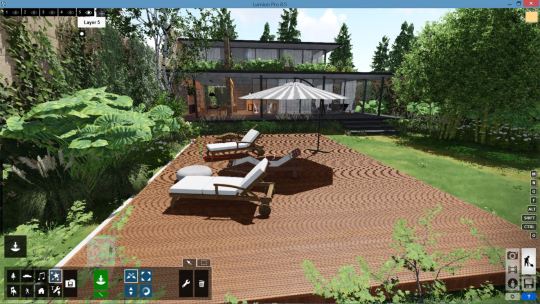
Assign Layers
In addition to showing multiple variations of a building or property, it can also help to assign certain objects to a layer and then show the layer at a specific point in the video.
For this animation, we assigned the mobile pool deck and the pool furniture to Layer 5. That way, we can animate the appearance of the swimming pool first with the Variation Control effect, and then have the pool deck and pool furniture show up later with the Layer Visibility effect.
Layer 5 Disabled
Layer 5 Enabled
Now that you have imported your model, imported the variation models and assigned certain objects to a layer, you can go about building the rest of the scene, adding trees and other objects, and then texturing and applying beautiful materials to make your building truly “pop.”
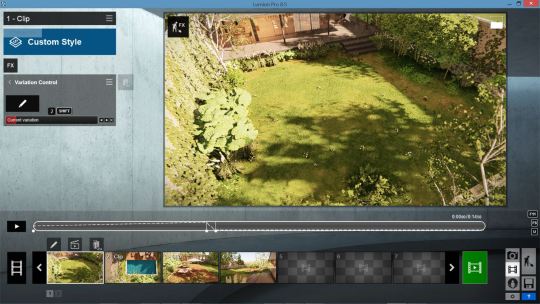
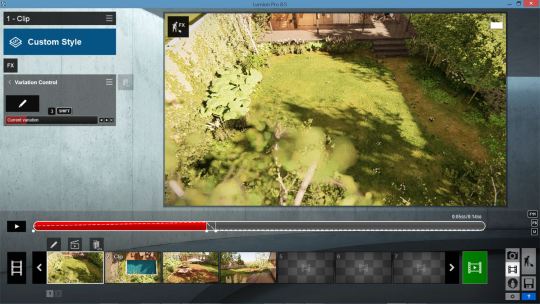
Create the Individual Video Clips
The entire, 26-second animation was created using only four clips. The entire video layout looks as so:
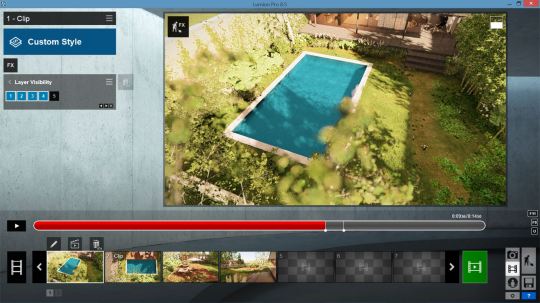
Clip 1
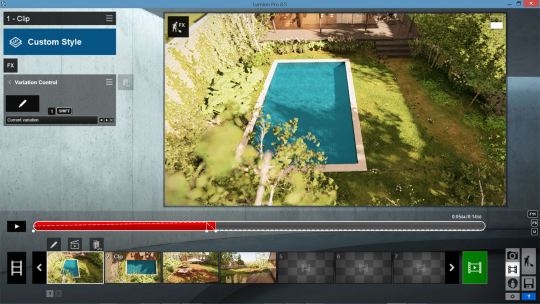
In the first clip, we took three photos in Lumion’s video-maker to animate the camera’s pathway. The camera in this clip circles around the backyard as the swimming pool pops into place.
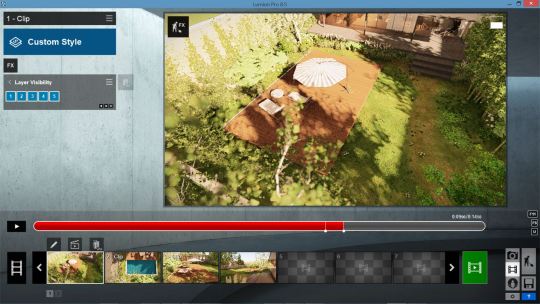
Clip 2
In clip two, we have an overhead pan showing the wooden cover closing over the pool. To make this clip, we took two photos in Lumion’s video-maker.

Clip 3
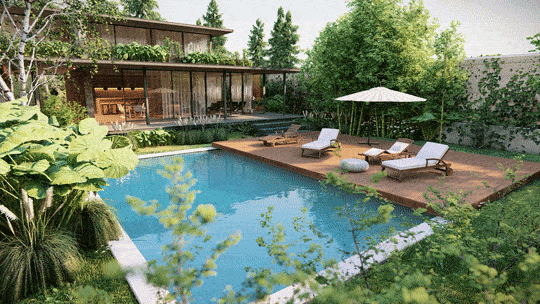
For clip three, we figured it was best to show the backyard in its entirety. This way, the client can see what his/her whole backyard will look like with the pool and the sliding pool deck.
Clip 4
Then, to close off the video, we needed a clincher, something for the client to walk away with.
Because of the importance of this last shot, we simply did a pan of the backyard (6 seconds of animation from 2 photo points), giving the client the time needed to fully absorb the swimming pool’s appearance in the backyard.
Inject style and mood with the right concoction of effects
After importing the variation models, placing the pool deck and furniture in a layer and preparing the individual clips of your movie, it’s time to inject life into the scene with the right assortment of effects.
Below, we have a gif of rendered images showing how each effect impacts the look of the backyard scene.
Below, you can find the individual effects and their settings.
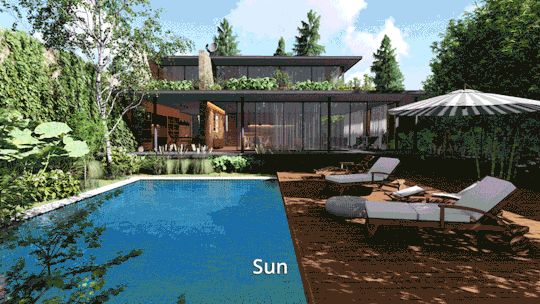
Sun
- Sun Height: 0.3
- Sun Heading: 0.3
- Sun Brightness: 0.8
- Sun Disk Size: 0.0
Shadow
- Sun Shadow Range: 4000m
- Coloring: 0
- Brightness: 0.2
- Interior / Exterior: 0.0
- Omnishadow: 3.0
- Shadow Correction: 0.0
- Shadow Type: Normal
- Soft Shadows: On
- Fine Detail Shadows: On
Reflection
- Edit: Add the reflection planes where relevant
- Flicker Reduction: 0.5
- Reflection Threshold: 25.0cm
- Speedray Reflections: On
Sky Light
- Brightness: 2.0
- Saturation: 1.0
- Sky Light in Planar Reflections: Off
- Sky Light in Project Reflections: Off
- Render Quality: High
Hyperlight
- Amount: 30
Global Illumination
- Sun Amount: 0
- Falloff Speed: 84.4
- Reduce Spots: 1.0
- Sun max effect distance: 30.0m
- Preview Spotlight GI and Shadows: Off
Chromatic Aberrations
- Dispersion: 0.02
- Affected Area: 0
- Safe Shadows: 0
Sky and Clouds
- Position: 0.3
- Cloud Speed: 0
- Master Cloud Amount: 0.7
- Low Clouds: 0
- High Clouds: 0
- Cloud Direction: 0
- Cloud Brightness: 0.2
- Cloud Softness: 0.4
- Low Cloud Softness Removal: 0.8
- Sky Brightness: 0.6
- Cloud Preset: 1.0
- Cloud High Preset: 0.3
- Overall Brightness: 1.3
Color Correction
- Temperature: 0.7
- Tint: 0.3
- Vibrance: 0.4
- Brightness: 0.5
- Contrast: 0.6
- Saturation: 1.0
- Gamma Correction: 1.1
- Limit Low: 0
- Limit High: 1.0
Analog Color Lab
- Style: 0.9
- Amount: 0.6
Selective Saturation
- Color selection: 0.3
- Range: 1.0
- Saturation: 0.3
- Darkness: 0.5
- Residual Color Desaturation: 0.0
Depth of Field
- Amount: 100.7
- Foreground/Background: 0
- Focus distance: 3.6m
- Sharp area size: 0
- Auto Focus: Off
Exposure
- Exposure: 0.5
Sharpen
- Intensity: 0.4
Vignette
- Vignette Amount: 0.1
- Vignette Softness: 0.8
Wind
- Foliage Wind Strength: 0.4
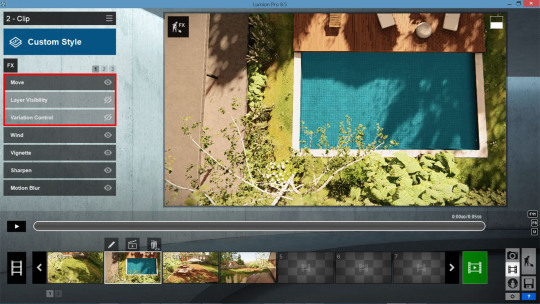
Applying Layer Visibility, Variation Control and Move
In addition to applying ‘image quality effects’, we need to add the ‘animation effects’ to show the appearance of the swimming pool and the closing pool deck.
For instance, in Clip 1, we used the Variation Control and Layer Visibility effects, while in Clip 2 and 3, however, we needed to animate the sliding pool deck using the Move effect. Below, you’ll find out how we applied these three animation effects to the individual clips.
Clip 1
As mentioned earlier, the goal of Clip 1 was to introduce the client to their current backyard and show a variation with the pool. Using keyframes and the Variation Control effect, the model with the pool was able to appear at a specified moment.
Here’s how we did it:
1. Create the first keyframe at zero seconds and set the ‘Current variation’ slider to the model without the pool.
2. Create the second keyframe to indicate a variation switch. Set the ‘Current variation’ slider to the same number (as the model without the pool) or a blank variation.
3. Create the third keyframe and set the ‘Current variation’ slider to the model with the swimming pool.
*Note: The actual switch happens at the center point between the keyframes. If you don’t add the second keyframe, the switch will occur halfway between the first and the third keyframes.
The next step is to get the pool cover and pool furniture to appear with the Layer Visibility effect from the ‘Scene and Animation’ effects in Movie Mode.
Using keyframes, like with the Variation Control effect, you can make the layer appear at the right moment. Here’s how we did it:
1. Set the first keyframe to indicate the layers you want to show before the appearance of Layer 5.
2. Set the second keyframe to designate the appearance of Layer 5.
Clip 2 and Clip 3
For Clip 2, we no longer need the Variation Control effect or the Layer Visibility effect. Therefore, for these clips, you can simply disable them from your effect stack.
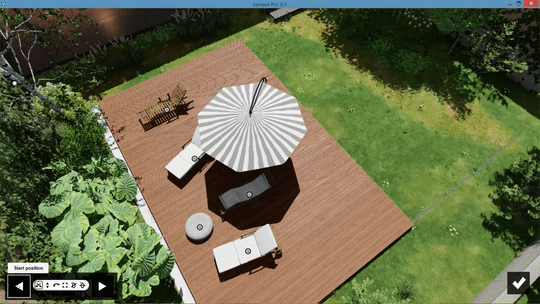
To get the effect of the moving pool cover without post-processing or having to use third-party software, you can use the Move effect in the ‘Scene and Animation’ effects in Movie Mode.
Here’s how we did it:
1. Click on “Edit” to select the items you want to animate at the start of the clip. With the ‘Move’ effect, you can only select one item at a time.
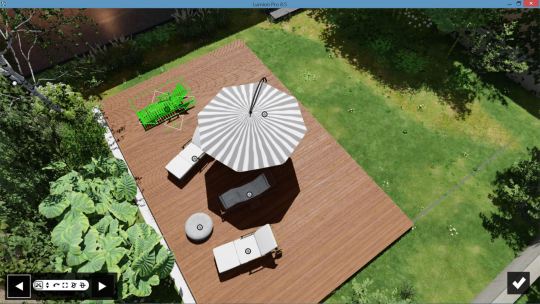
2. You can animate the position, height, rotation, scale and pitch of the selected item. With the object selected, move it to its starting position.
3. Select the ‘End Position’ triangle to confirm the ending point of the animated object.
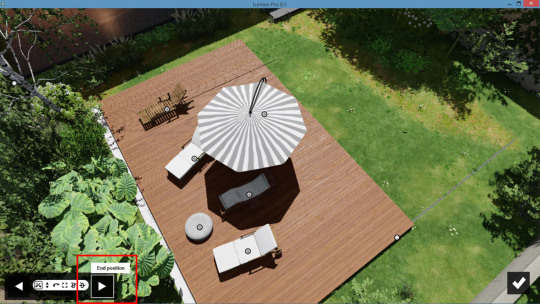
4. Repeat with every object you want animated. You will see black lines indicating the movement of the objects.
Create movement and pull viewers into your designs
By using the right effects, from the Move effect to Layer Visibility and Variation Control, you can create a dynamic, exciting animation that’s assured to pull your client into the spaces you’ve designed.
#Lumion