Lumion BLOG
Feel the space with Lumion
Go from a 3D model to a beautiful render in under 30 minutes
TweetShareShareShareOnly have 30 minutes before your renders are due? From the unique lean scene-building workflow to the assortment of one-click features and effects, Lumion 9 can help you communicate the beauty of your designs faster than any other 3D rendering program out there.
Not everything goes to plan, and when deadlines are sprung upon you, seemingly out of nowhere, it can be helpful to have the right tools.
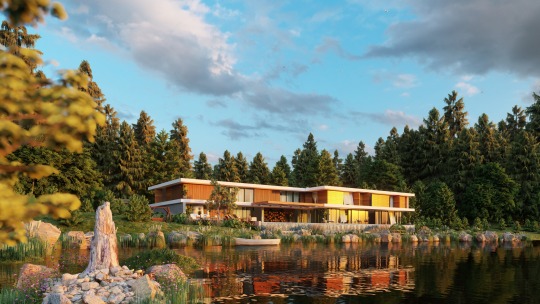
For instance, imagine you’ve spent the past few weeks designing a new-build house for a meticulous client. You’ve finished all of the basic architectural drawings and you built a 3D model in SketchUp. But then, the senior architect comes up to you (her face is pale and you know something is troubling her) and exclaims, “The client just called and he will be here in 30 minutes. We need one decent render, ASAP!”
One option is to simply collapse like a marionette without strings, repeating “I give up…” Or, with the help of a 3D rendering tool like Lumion 9, you can sit back, relax and say, “Sounds good boss!”
So you open up Lumion and SketchUp (or your favorite modeling software) and get started. Let’s see an example of what this could look like and how you can go from a 3D model to a final render in 30 minutes or less.
Importing the 3D model
There are several ways to import your 3D model into Lumion. For one, you can simply import a model using the green “IMPORT” button in the lower left-hand corner of the Build Mode interface.
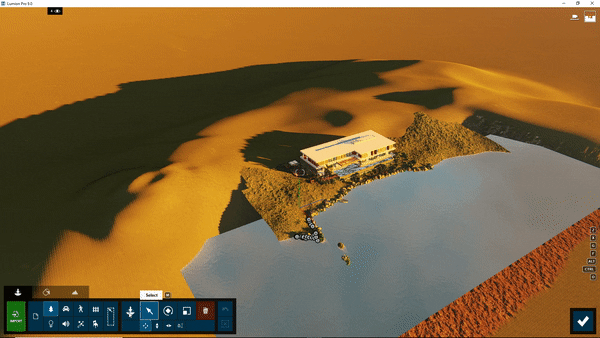
You can also import your 3D model with LiveSync, allowing you to simultaneously model and render. Currently, LiveSync in Lumion 9 is only available for Revit, SketchUp, ArchiCAD and Rhino. For the Lake House, we initiated LiveSync between SketchUp and Lumion.
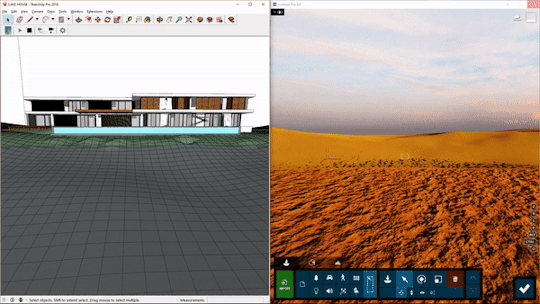
The import placed the building at 0, 0, 0, which is unfortunately right within the landscaping of this scene. In this case, you can quickly raise the object by selecting the building and hitting the M key and then the H key (this allows you to change the height of your object).
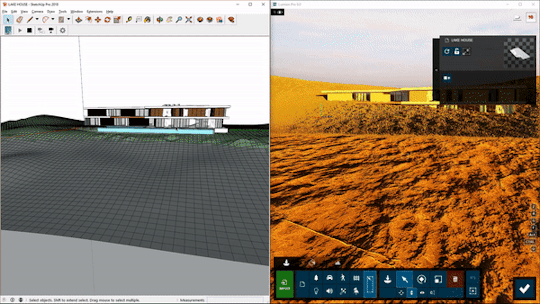
And lastly, you can start adding materials to give the scene some life.
Modifying your model with LiveSync
Let’s say you used LiveSync for SketchUp to import your 3D model into Lumion. While inspecting the scene in Lumion’s editor, you notice a serious error in your model: the wooden porch isn’t aligned correctly.
Fortunately, with LiveSync, design iteration is quick and easy:

When you have an issue with the 3D model’s design, materials or anything else, LiveSync enables fast and automatic rendering so that you can instantly view what you fixed in your modeling software.
Lean scene-building workflow
As a short overview, some of the new elements of the lean scene-building workflow in Lumion 9 include:
- Tabs are arranged horizontally (Objects, Materials, Landscape and Weather).
- “Place” and “Move” are now combined into one, intuitive object mode.
- Selecting objects now happens in the Build mode so that you can cycle between objects without losing sight of your model and its environment.
- You can select an object by clicking on the node or the object itself.
- Once you place an object, it’s already selected so that you can start doing adjustments immediately.
- If you hold down the F key while you’re rotating a model, you can make the orientation of that model match the surface that the cursor is pointing at.
- You can instantly get a better perspective on any object in your scene by double-right-clicking.
- Do you love a group of objects you want to use again and again? It’s now possible to save and load object group arrangements as a Lumion Group file (.LSG9).
- And several others…
Want to learn more about the new workflow? Check out Mike Brightman’s tutorial about the new interface:
The new Lumion 9 interface comes with many more time-saving features, helping you build a beautiful, living scene in no time at all. Additionally, you have multiple hotkeys that will adjust your model before you place it. These include:
- Use the R key to rotate before placing a model.
- Use the H key to change height before placing a model.
- Use the L key to adjust the size before placing a model.
Adding trees with mass and cluster placement
Want to add a large number of objects all at once? For the Lake House render, we were able to create the full-looking forest scene in just a few minutes using the Mass Placement and Cluster Placement tools.
Scene without trees
Mass Placement
Cluster Placement
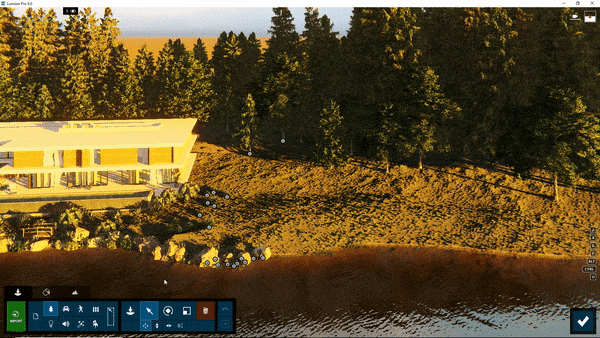
Scene with trees
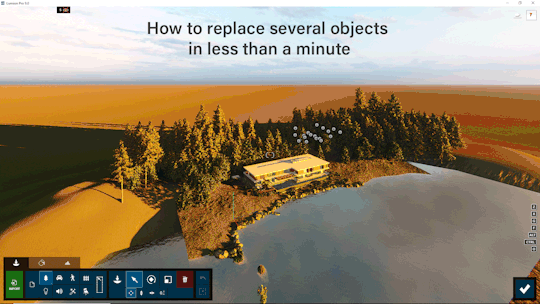
Replacing several objects
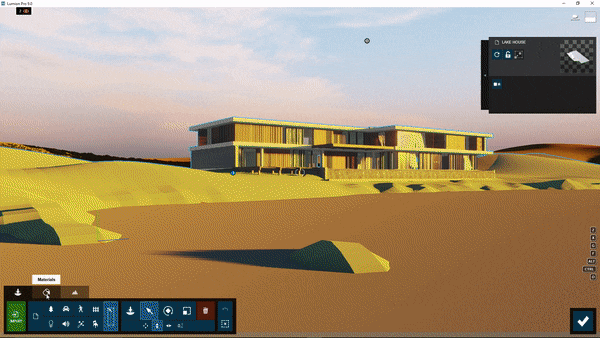
After placing an object, you can start adjusting some of its properties with the new advanced properties option in the upper-right corner of the Lumion editor. Many of these previously buried buttons are now readily available on-screen.
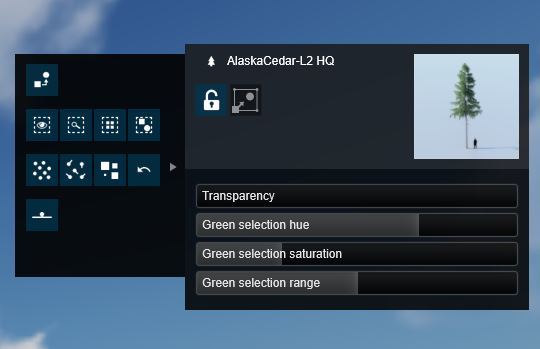
Did you add a large number of trees, only to find out they were the wrong trees? Well, the first thing is to not panic, because by coupling the “Replace Selection” command with the new library interface, you can easily replace all of the trees in under a minute.
Simply click on a node or the object itself to select it and hold CTRL to add more objects to the selection. Or, in the Advanced Properties tab, you can click on “Select All Identical Objects” or “Select All Objects in Category” to instantly select a large number of objects. Once you have selected the objects you want to replace, click on the “Replace Selection” button.
Here is how to replace one type of tree (in gif form):
These small refinements in the Lumion interface will make your workflow much smoother, more intuitive, and more enjoyable. At the same time, you’ll save tons of time producing standout scenes!
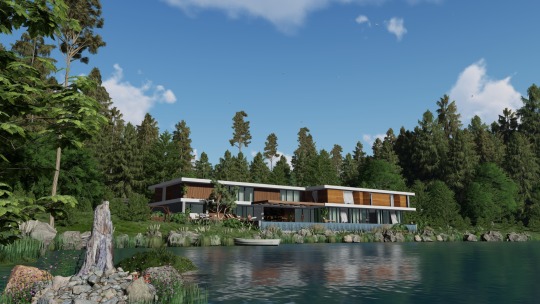
Preparing the look and feel of your render
Let’s recap. So far, we’ve used LiveSync to import the 3D model of the Lake House. After adding materials and while reviewing the design, however, we noticed a mistake with the patio and fixed it. Next, with the help of the lean scene-building workflow and tools such as Mass Placement and Replace Selection, we were able to quickly build a full, realistic scene that reflects the building’s real-life site location.
At this stage, about 25 minutes have passed and you only have 5 minutes to go before the client arrives. Fortunately, Lumion’s assortment of Photo, Movie, and Panorama effects can streamline the “render beautification” process.
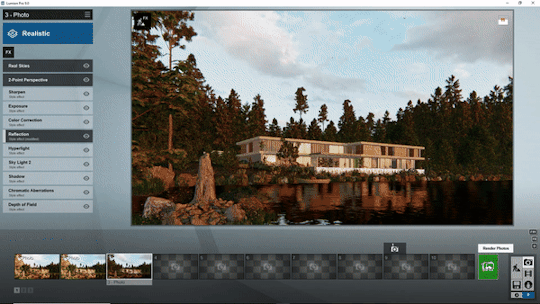
If you want to go straight from Scene to Beautiful Render, here is the method with the fewest steps possible:
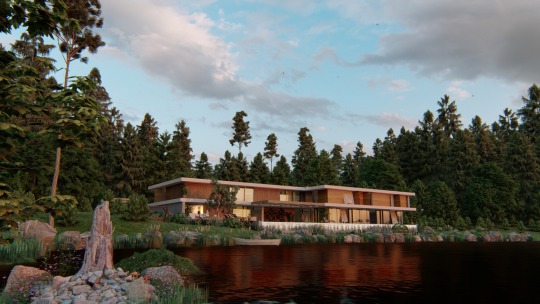
Starting here
Add a Realistic Style
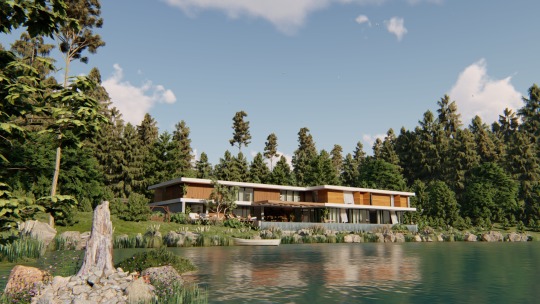
Add a Real Sky
Don’t forget your reflections and (if applicable) 2-point perspective!
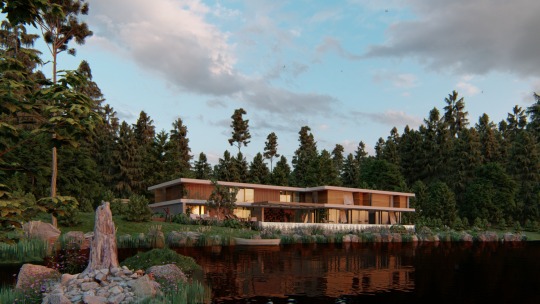
Render
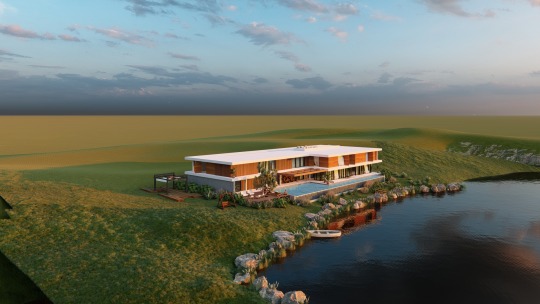
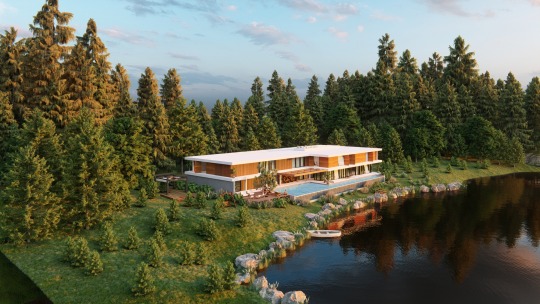
Final Result

One problem with using a pre-configured effect (such as the Realistic Style) is that you get a pre-configured render. This is not suitable for many firms who want to show the unique style of their designs.
Luckily, this workflow serves as a launchpad for quickly getting unique, stylistic renders ideal for your projects and your firm. After adding the Realistic Style, for example, you already have the foundations for a beautiful render that you can modify and adjust to suit your needs.
Your launchpad to amazingly fast rendering
Whether for Styles, Real Skies, the customizable 3D grass, or any of the pre-configured effects and features, you can use them as a starting point for amazingly fast rendering.
Give your designs the attention and beauty they deserve, and never waste a second, by adding Lumion to your firm’s workflows!
Order Lumion today: https://lumion3d.hk/buy.html
#Lumion