Lumion BLOG
Feel the space with Lumion
Design it live: How Lumion 9 and Rhino 6 take real-time rendering to new heights
TweetShareShareShareLiveSync is one of Lumion’s most popular and celebrated features. Now, in Lumion 9, Rhino users can also take advantage of simultaneous modeling and rendering, seeing their designs in the context of Lumion’s stunning, real-world editor.
Architecture is anything but a linear process.
It’s pretty rare that an architect will sketch a design, build a 3D model, render some images and get the client, all in that specific order. More likely, the architect will sketch, start building a 3D model, discover some problems in the model, return to sketching, try a few renderings, go back to the model, render some more, get feedback from client, iterate the model again, create some more renderings, present to the client, etc.
Now, with LiveSync for Rhino available in Lumion 9, all Rhino users can bring modeling and rendering into the same screen space, providing a clear, real-time view of your design in the context of the real world.
Activate the LiveSync for Rhino plugin and you can instantly heighten your workflow efficiency when adapting the design. Moreover, you’ll be able to make more informed design decisions during internal reviews, and you’ll be delivering impressive, polished client presentations in no time.
In this blog post, we’ll go through the basics of LiveSync for Rhino, from showing you how to download and install the plugin, to providing some camera and usage tips. Let’s dig in!
How to download the LiveSync for Rhino plugin
The first thing to keep in mind is that LiveSync for Rhino is only available for Rhino 6 and newer versions. If you have a previous version, then the LiveSync plugin won’t work.
You can download the LiveSync for Rhino plugin from Food4Rhino, available here. Simply click on the green download button to begin the download.
Here is a brief gif going through this process:
The next step is to install the plugin for your Rhino 6 license.
How to install the LiveSync for Rhino plugin
Now that you’ve downloaded the LiveSync for Rhino plugin, the next step is to make sure that you’ve closed Rhino. This step is important as it helps the plugin installer while greatly reducing the possibility of hiccups and other potential problems.
After closing Rhino, locate the plugin you downloaded. Remember, the LiveSync for Rhino installer is an .RHI file and the file name may be something like Lumion_LiveSync_for_Rhino6_(VERSION).rhi.
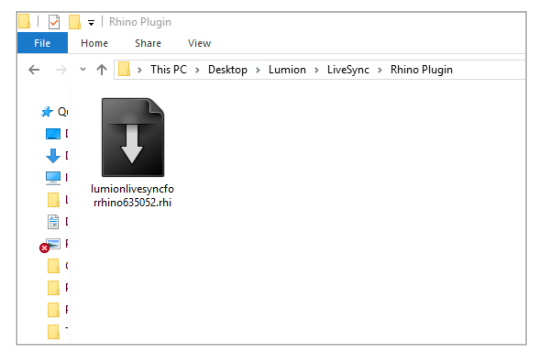
Once you’ve located this file, click on it to launch the installer.
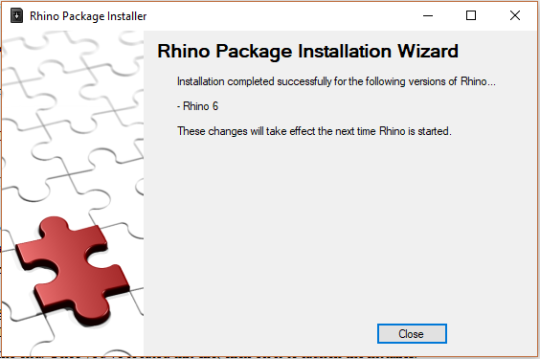
A screen should pop up saying, “Rhino Package Installation Wizard.”

Here, you can choose whether to install the LiveSync for Rhino plugin for just you (based on your specific Rhino account and license) or for anyone who uses the computer with the Rhino and Lumion software installed. Choose the option best suited for you and hit ‘Next’ to begin the installation.
You will get another popup saying that the plugin was installed and that it will be available the next time you start Rhino.
So, open up Rhino and start Lumion!
Are you having installation issues? Refer to this helpful guide here.
How to launch LiveSync for Rhino
If LiveSync for Rhino was properly installed, you should be able to see the plugin on your Rhino interface. Feel free to move it to the ideal location for you. In the screenshot below, you can see that we moved the plugin so that it’s part of the Rhino toolbar.

To start LiveSync for Rhino, simply open your Rhino model and choose the ‘Perspective’ view, as this one allows you to fully rotate and move the 3D model.
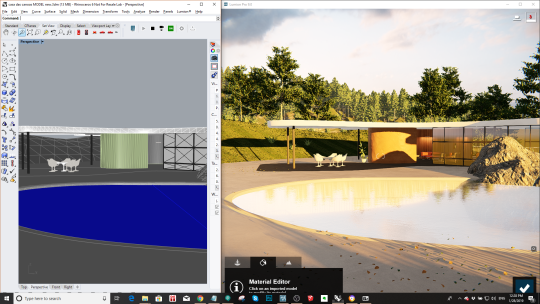
Next, open a new scene in Lumion and give yourself the best viewing angle to see both programs simultaneously. If you have one monitor, you can split the screen as shown in the gif below.

If you have two monitors, you can place Lumion on one screen, and Rhino on another.

You can start the synchronization, connecting your Rhino model to the Lumion 3D environment, by hitting the “Play” button of the LiveSync plugin. In just a few seconds, your 3D model should be imported into Lumion.

Now, as you continue to modify your model in Rhino, the modifications will be rendered automatically in Lumion.
How to view changes to the model
Lumion can import all sorts of CAD files and 3D models, from Collada (.DAE) to SketchUp® (.SKP) to Autodesk® (.FBX & .DWG & .DXF) to 3ds Max (.MAX & .OBJ) and many others, including Rhino models, but it doesn’t let you actually modify the model. With LiveSync, however, you can view changes to your 3D model instantaneously.
For instance, after importing the model into Lumion, you notice that the rock you modeled was too large. So how can you quickly fix this without having to re-import or re-connect the model to your Rhino scene?
Simple. Change the rock’s size in Rhino and it’ll be automatically rendered in Lumion’s editor.

You can also move objects in Rhino and they will move accordingly in Lumion, and you can hide objects in Rhino and the objects will (you guessed it!) hide in Lumion.
How to reconnect the 3D model to Lumion
There are going to be times when you’ll need to create another version of your Rhino model and save the model as a new file. However, the next time you go to start LiveSync with your previously built Lumion scene, you may discover that the model can’t be automatically reconnected.
Fortunately, as long as the first 5 letters of the model’s file name are the same (e.g. “Project_A,” “Project A_V1,” “Project A_V2”, etc), LiveSync will be able to locate the original file. If this is the case, you can reconnect the model by following these steps:
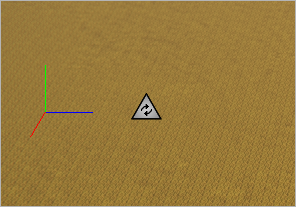
Step 1: Locate the triangle with the “Reconnect” symbol, or simply click on the model.
Step 2: In the model’s properties, click on the same “Reconnect” symbol.
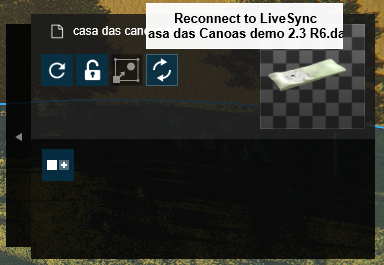
LiveSync should re-establish the connection, allowing you to go about your work as normal.
TIP: How to save the materials layout
Although it’s rare, there is the possibility that reconnecting the LiveSync model will result in a loss of the material assignments in your Lumion scene.
And re-assigning those materials will be a time-consuming pain.
For this reason, before you reconnect the Rhino model to your Lumion scene, it can help to be cautious and save the material set beforehand. This way, if you do lose your materials, re-loading them will just take seconds.
You can save the scene’s material set by following these steps:
- Select the “Materials Editor” button in the Lumion editor.
- Click on one of the materials in your scene.
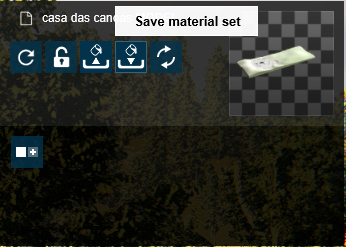
- Locate the “ Properties” window in the upper right-hand area of your screen.
- Select the “Save materials set” option and save the materials to an easy-to-find location.
If your model loses its material settings, you can load the materials set quite easily. Simply follow the steps above, but instead of selecting the “Save materials set,” click on “Load materials set” and open the .mtt materials file.
Now that you’ve got things going, here are a few “nice to know” facts about the LiveSync for Rhino plugin.
Nice to know #1: adding objects to the synced scene
Renders often look best when they have a real-looking environment surrounding the model. If the project is for a suburban neighborhood, then objects you’d typically see in suburban environments should surround the building you’ve designed. The same applies to rural, mountainous, oceanfront and any other type of property location.
Lumion has over 5,200+ objects in its massive content library, including everything from trees and landscaping elements to interior furnishings and more. Many of these models come with a very high level of quality, and so it’s often advised to use Lumion trees, for instance, instead of syncing the trees you may have downloaded and inserted into your Rhino model.
Nice to know #2: adding materials to the synced model
Adding any of Lumion’s 1,000+ customizable materials can have a substantial impact on the beauty and realism of your render. For instance, imagine you want to test a few water types for the swimming pool. With LiveSync, it’s easy to see how various material choices affect the look and feel of your design.
Nice to know #3: syncing the camera
LiveSync also enables camera synchronization between the viewpoint in Rhino and Lumion. This means that when you move the camera in Rhino, the camera in Lumion follows suit. By playing with the field-of-view, you can create some fairly interesting views.
While the camera synchronization is an amazing tool for keeping your field-of-view ordered and comfortable, you may need to disconnect it when modifying the model in Rhino. By disconnecting only the camera, it’s much easier to make changes to the model while keeping the Lumion camera in the same position.
Nice to know #4: building with effects
To view your project through a more realistic or conceptual/artistic lens, you can combine LiveSync with the Build with Effects feature in Photo Mode.
To view your project with all of the photo effects, click on Photo Mode and start setting up and stylizing the scene with effects. When you’re ready, simply click on the “Build with Effects” button in the upper left-hand area of the editor screen.
Reconnect LiveSync (if it is disconnected), and you can continue the LiveSync experience with the added benefit of realistic and artistic effects.
TIP: Keep in mind that you will likely need to adjust the focal length of the camera in Lumion so that it matches with the camera view in Rhino. Generally, changing the Lumion focal length to 35mm will solve this issue.
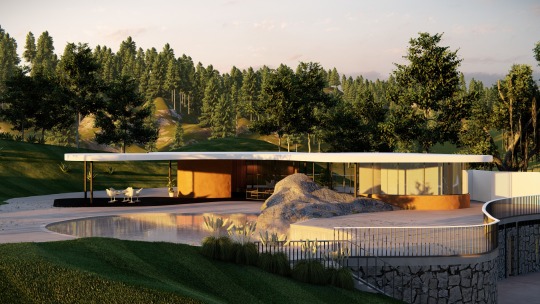
LiveSync with realistic effects
LiveSync with artistic effects
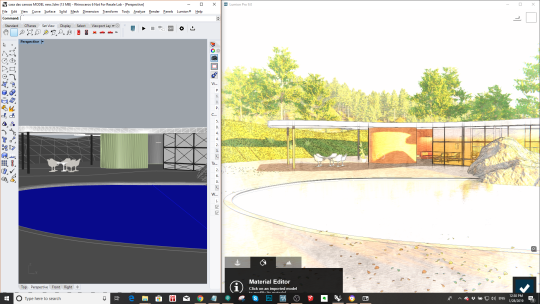
Using LiveSync with Build with Effects is great for getting the insight necessary to make important decisions about the project’s evolving design. It can show how the different lighting profiles throughout the day will impact the building’s exterior.
Even if you’re not using LiveSync to make design decisions, it can simply act as the fortune teller’s crystal ball — letting you see what your design would look like down the road, after it’s built in its real-life location. In other words, LiveSync helps you bring your design to life.
Model while you render; render while you model
LiveSync for Rhino is one of the most popular features in Lumion 9 and it’s available in both the Pro and Norm versions. With this addition to the LiveSync repertoire, you can now enjoy real-time 3D rendering with SketchUp, Revit, ArchiCAD and Rhino.
For more information about LiveSync or other Lumion 9 features, you can visit the What’s New page.
#Lumion