Lumion BLOG
Feel the space with Lumion
How to optimize your 3D model for faster Lumion performance
TweetShareShareShareWant to speed up your Lumion performance? Follow these helpful, 3D model optimization tips to reduce the size of your models and improve your real-time rendering experience in Lumion.
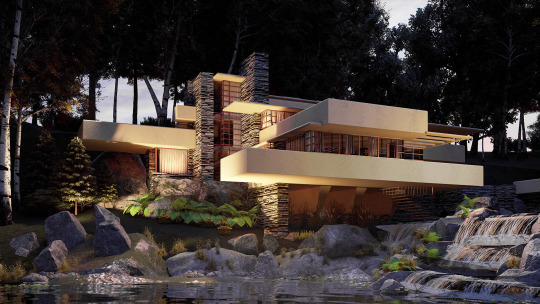
Imagine you created an incredibly detailed 3D model of your latest design. The model includes complex, intricate details such as beautiful, carefully selected nature objects and highly realistic materials and textures.
These details have made the model quite heavy and, while Lumion is certainly capable of handling large models with ease, sometimes the model can become so huge that it ends up slowing down the performance in Lumion’s real-time editor.
So, what can you do to reduce the model size and improve your Lumion experience?
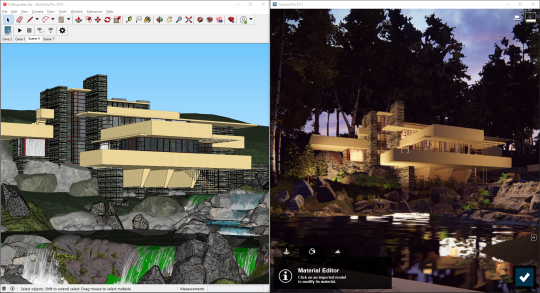
When exporting your model from your 3D modeling software, such as SketchUp (above left), reducing its complexity may improve performance in Lumion.
One possibility is to optimize your 3D model by implementing efficient modeling techniques or reducing the model’s polygon count, all without negatively impacting the visual quality of your model.
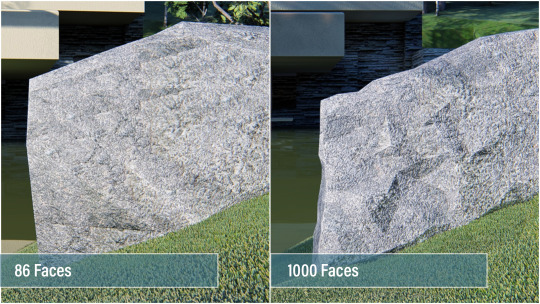
Low-polygon model on the left, high-polygon model on the right. It’s pretty easy to spot the difference in quality.
In this blog post, we’ll take you through a crash course on 3D model optimization and how you can reduce the size of your 3D models for faster performance in Lumion. Please note that this article focuses on SketchUp, Revit and ArchiCAD models, though some of the tips you’ll learn here can apply to your modeling software.
What are polygons in 3D objects?
All 3D objects, also known as 3D models, are built up of polygons. These are triangular surfaces with three points (also known as vertices or 3D points), and in every 3D object, these polygons contain certain information associated with it, such as the texture, light and shadow mapping, and more.
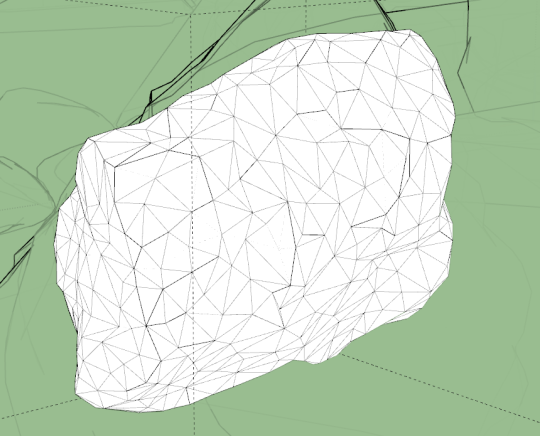
Polygons in a detailed rock model (SketchUp).
Typically, 3D objects with a higher polygon count will look better (extrusions, beveled edges, chamfer edges, etc), but these high-detail models will demand more performance from your computer. Furthermore, inefficient 3D object building can lead to huge polygon counts for a little improvement in detail. For instance, one tree can include 2,000 polygons while another, similar-looking tree can contain over 20,000 polygons (if it is inefficiently built). If these trees are just background items, then you may be creating a very heavy scene in Lumion, unnecessarily.
Here is an example of how polygons are used in 3D objects, and how they can vary widely:
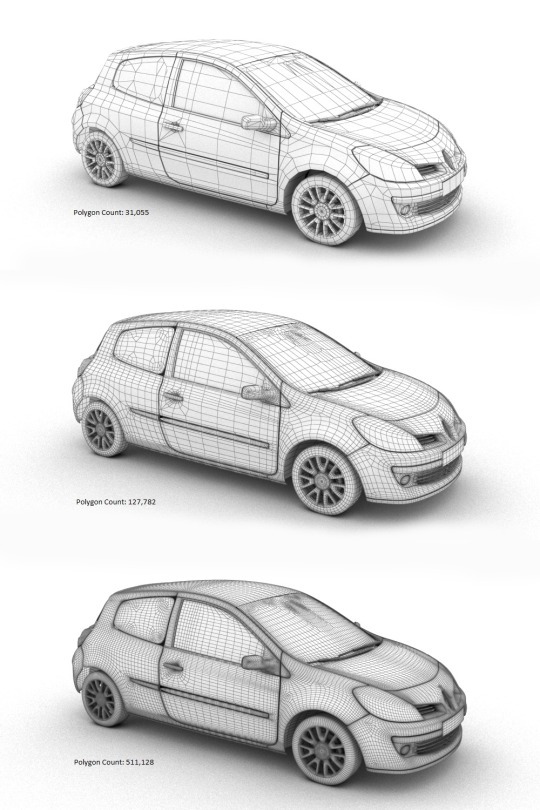
Above: The same object with three different polygon counts.
When all is said and done, the trick when optimizing a 3D model is to reduce polygon count without impacting the overall look and accuracy of the model. You should try to reach a middle ground, balancing the quality of your model and its size.
Lumion Tip: Improve real-time performance by putting models into layers
One tip to quickly improve your Lumion performance is to import your models separately and assign them to layers in Lumion.
For instance, instead of importing the entire model from SketchUp (with furniture, curtains and other objects), you can import the building structure and rock objects separately and assign them to layers in Lumion’s editor.

Adding the imported terrain increased the size of the Lumion scene from 17.1 million 3D points to 23.5 million 3D points.
By putting these models into layers, you can control when they appear in the editor. That way, if you’re only working on the building, you can temporarily hide the layer with the terrain so that you can have better performance when working on the building. In the GIF above, you can see an increase in the model size (and the performance requirements of your hardware) when turning on the layer containing the imported objects and terrain.
How to optimize your 3D model in SketchUp
When importing very large (more than 20 MB) models from external 3D CAD software, SketchUp recommends that you run the model through a poly reducer. Within SketchUp, there are different types of plugins and third-party software to reduce a model’s polygon count. One extension that comes with an array of useful organic modeling tools, including a polygon reducer, is the Artisan extension for SketchUp.
With the Artisan plugin ($39 for a permanent, single-seat license), you can take advantage of multiple tools that allow you to subdivide and smooth your model, paint, adjust vertices, and reduce polygons.
In this GIF, you can see the Artisan “Reduce Polygon” tool in action. Click the tool and you can choose the percentage of polygon reduction, from 10% to 90%.
Another plugin that came as a suggestion from SketchUp is Skimp, a SketchUp polygon reducer ($65 per year for a standard license). By downloading and installing Skimp, you can easily reduce the number of faces and polygons in your model while maintaining the visual appearance.
Some other SketchUp model optimization tips include:
Use simple textures
Texture size can have a significant impact on the size of your Lumion model. For instance, in a recent test, we found that a 16K by 16K texture increased the Lumion model file by 1 GB.
Hide geometry
Hide geometry that you don’t need and control the visibility of the geometry with layers. Whether you use layers in SketchUp or Lumion, make sure to use them effectively for improved performance.
Additionally, another tip is to use normal maps or bump maps to create the illusion of 3D geometry with the added benefit of reducing the poly count of the 3D model. You can watch a video about this topic by Mike Brightman here.
How to optimize your 3D model in Revit
Within Revit, there are several helpful resources about reducing polygon count and optimizing your 3D model before exporting it for rendering in Lumion. For instance, in the guide titled, “About Limiting Model Geometry Before Exporting,” the author discusses how you can reduce the amount of model geometry and its underlying data.
To limit the model geometry before exporting, there are three ways to go about it, including:
Managing the visibility of views
Turn off the visibility of graphics and for categories of elements in the view. This can mean turning off interior elements of a building or the surrounding landscape topography, for instance.
Exporting section boxes
By using the section box tool for the 3D view, you can tell Revit to only export items within the section box. This can be particularly helpful for large models.
Specifying the detail level of your model with LiveSync
Another way to influence the model’s geometry is through the Lumion LiveSync for Revit plugin. Instead of setting up a live connection, you can use LiveSync to determine the level of detail in your model before exporting it as a Collada (.DAE) file.
By clicking on “Export” button in the LiveSync Add-In, you will see an “Export to Lumion” box with options such as “Insertion Point,” “Surface Smoothing” and a few others.
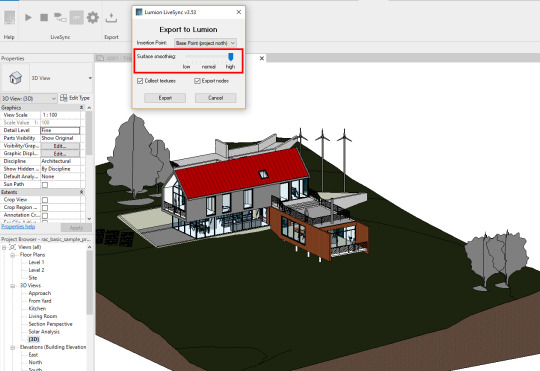
LiveSync’s “Export” and “Surface Smoothing” feature lets you determine the amount of detail in the exported model.
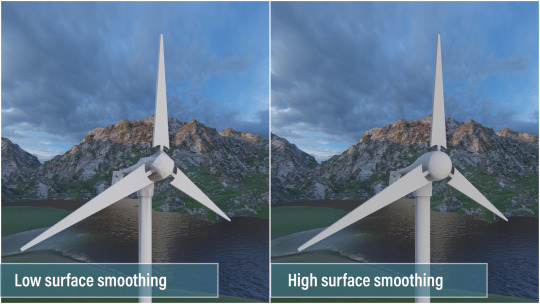
The “Surface smoothing” slider determines the complexity of your model as well as the look of curved surfaces. Low surface smoothing, for instance, results in a lighter, less complex model; high surface smoothing results in a heavier, more complex model. You can see the results in the image below:
How to optimize your 3D model in ArchiCAD
So far, we’ve discussed model optimization tips for SketchUp and Revit. The next and final modeling software we’ll look at in this post is ArchiCAD.
As a rule-of-thumb, you’ll want to limit the amount of 3D geometry in your ArchiCAD design by following these four tips:
- Use Lumion trees as opposed to ArchiCAD trees
- Use Lumion objects as opposed to imported objects
- Try to not multiply layouts. Multiplying one layout with different variations can result in a massive, high-poly model.
- Avoid the Morph Smoothing function, if possible.
To see how many polygons are in your ArchiCAD model, you can download the Polygon Counting Tool add-on. The Polygon Counting Tool can help you control the number of 3D polygons in your model and it can also display the number of 3D polygons grouped by element types (walls, slabs, doors, windows, objects, etc.).
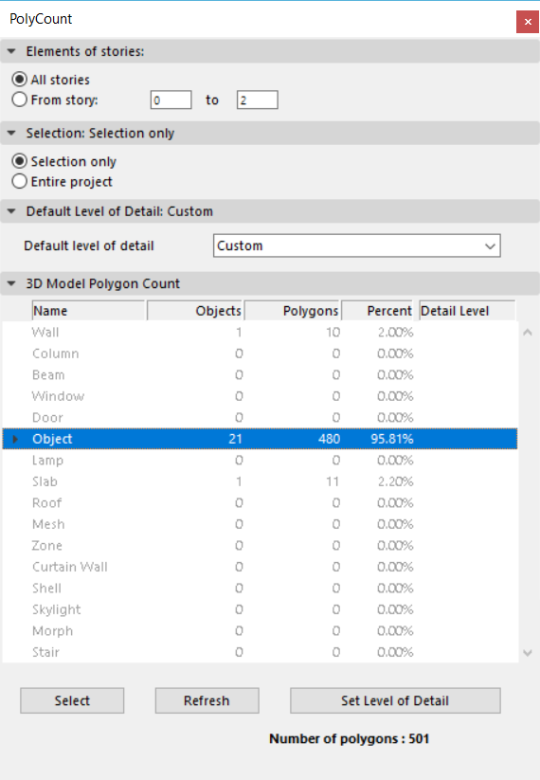
Polygon Counter Tool. Source: helpcenter.graphisoft.com
After downloading and installing this add-on, you can change the level of detail (LOD) of certain library parts in the project. The different LOD options include detailed, simple, custom and off.
One final tip with ArchiCAD model optimization involves placing grass on a large Mesh. By using smaller meshes, or cutting a large mesh into smaller meshes, you can improve performance in Lumion.
Expand possibilities with faster, stress-free Lumion performance
No matter the 3D modeling software that you use, there are always some tricks you can use to optimize the size of your model for better performance in Lumion.
And as always, it’s important to make sure that you have the right hardware for the best experience in Lumion. You can read our 101 hardware guide here.
#Lumion